
Within the Schedule Section, users are able to add their own Travel Items for current and upcoming Tour Dates. You can control who can see Travel Items using Visibility as well.
This article covers how to:
Understand Auto Title and Custom Title
Understand Confirmed and Unconfirmed
Enter Times and Set Day Of or Day After
Assign Parties to Travel Items
Set Travel Time, ETA, and Distance
Add a Travel Item
Users can add, edit, or remove travel items through the Schedule section of Master Tour Mobile.
Selecting the + button in the top right corner of the Schedule section opens a new Schedule Item. By selecting the dropdown menu in the top left corner of the item, you can switch the item type to the corresponding form of travel you wish to add.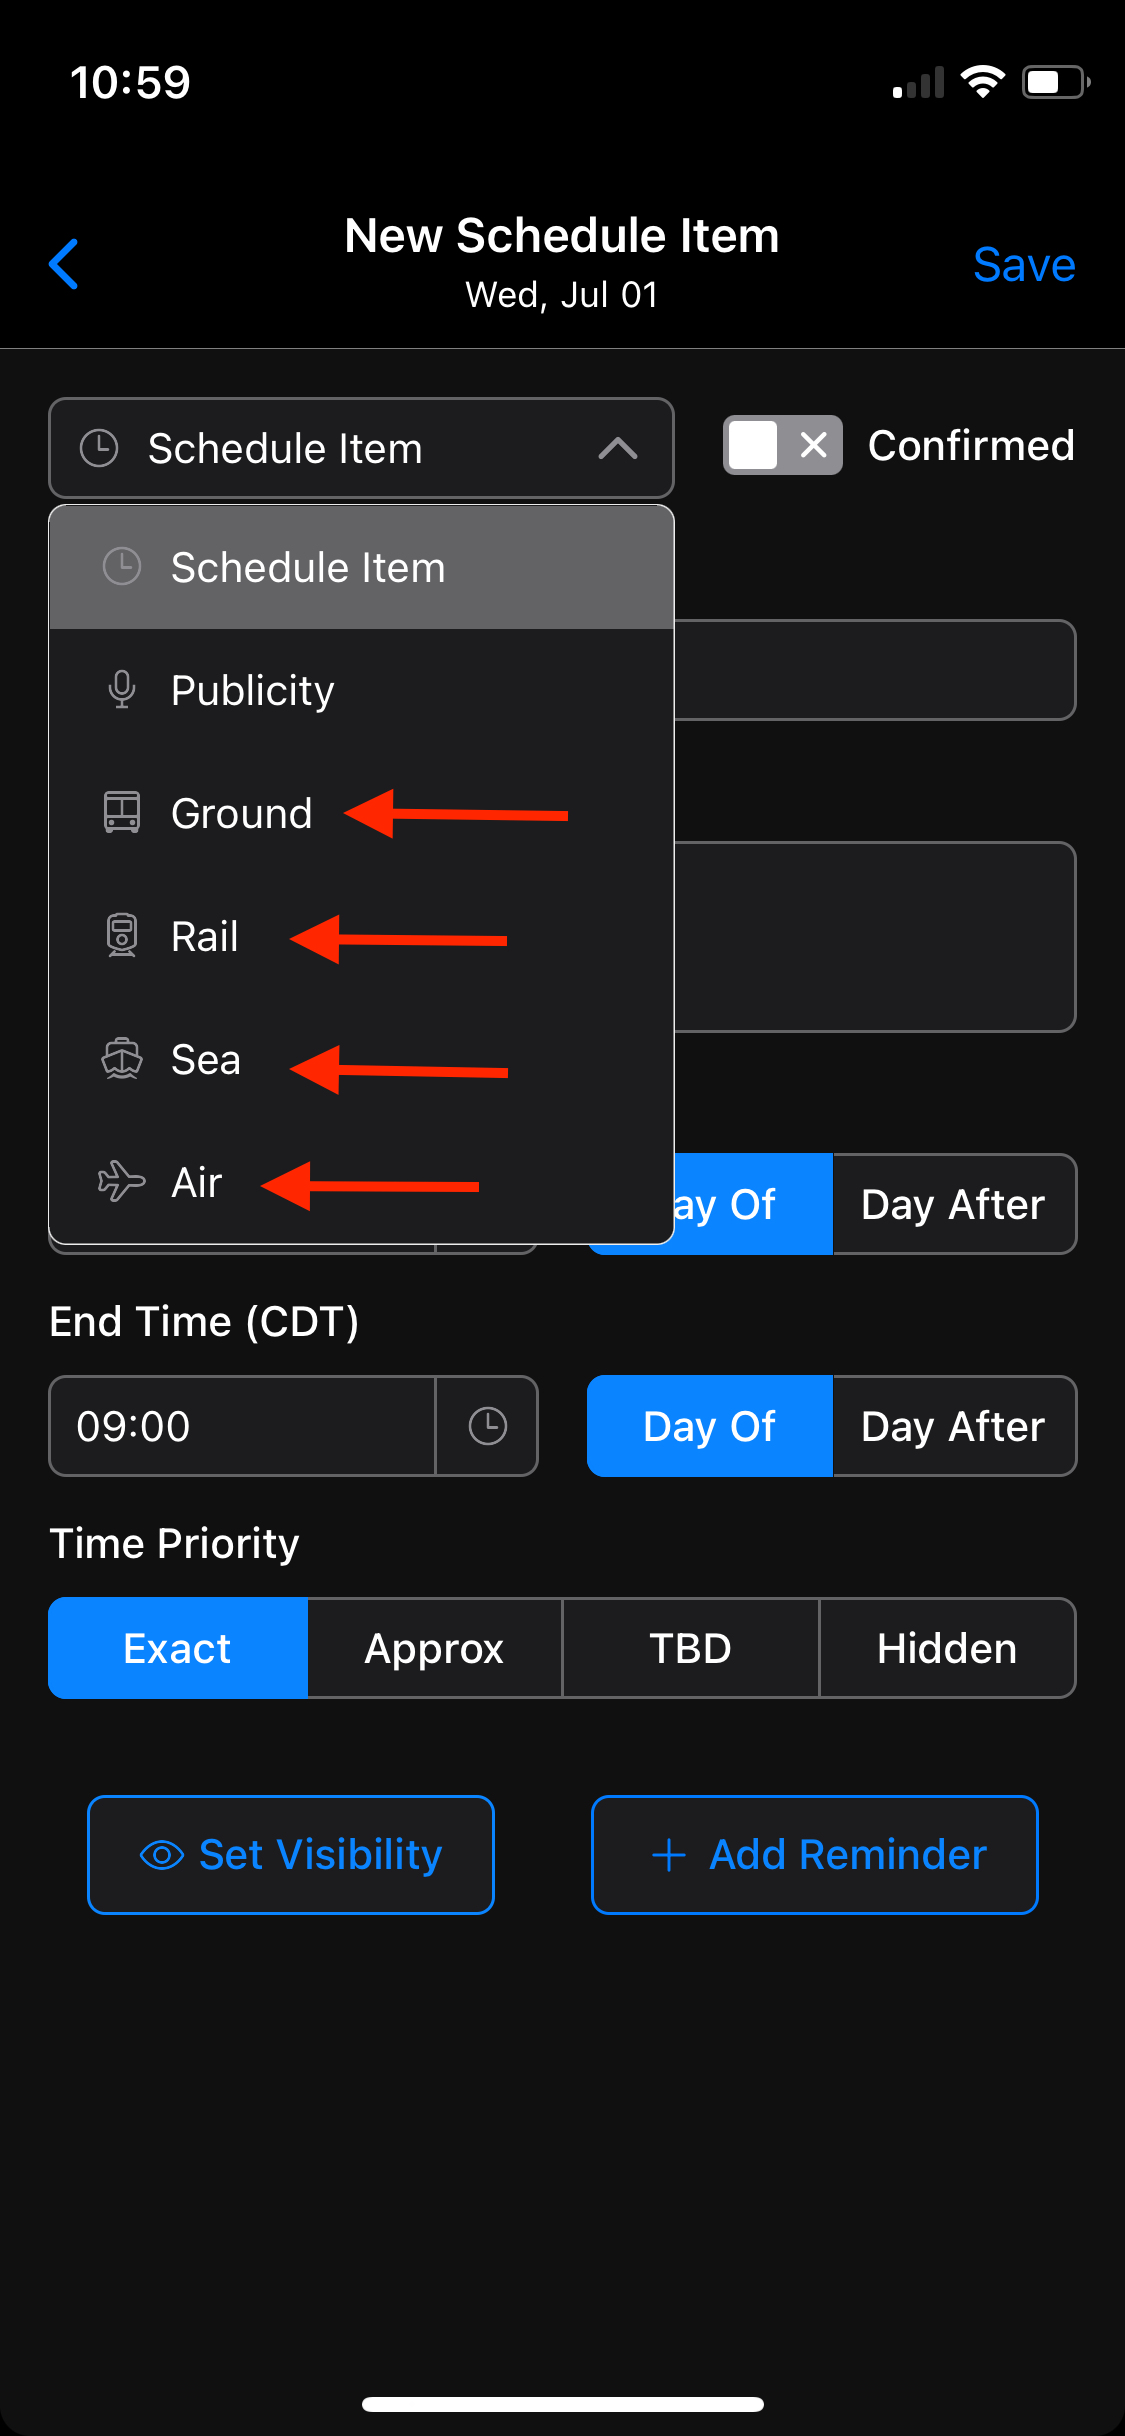
Adding Ground Travel
Selecting Ground within the Item type dropdown menu creates a field section below where you can enter the title and party for the item, as well as time priority, departure/arrival address, departure/arrival time, time zones, travel details, travel time, ETA, distance, and type of unit for distance measurement.
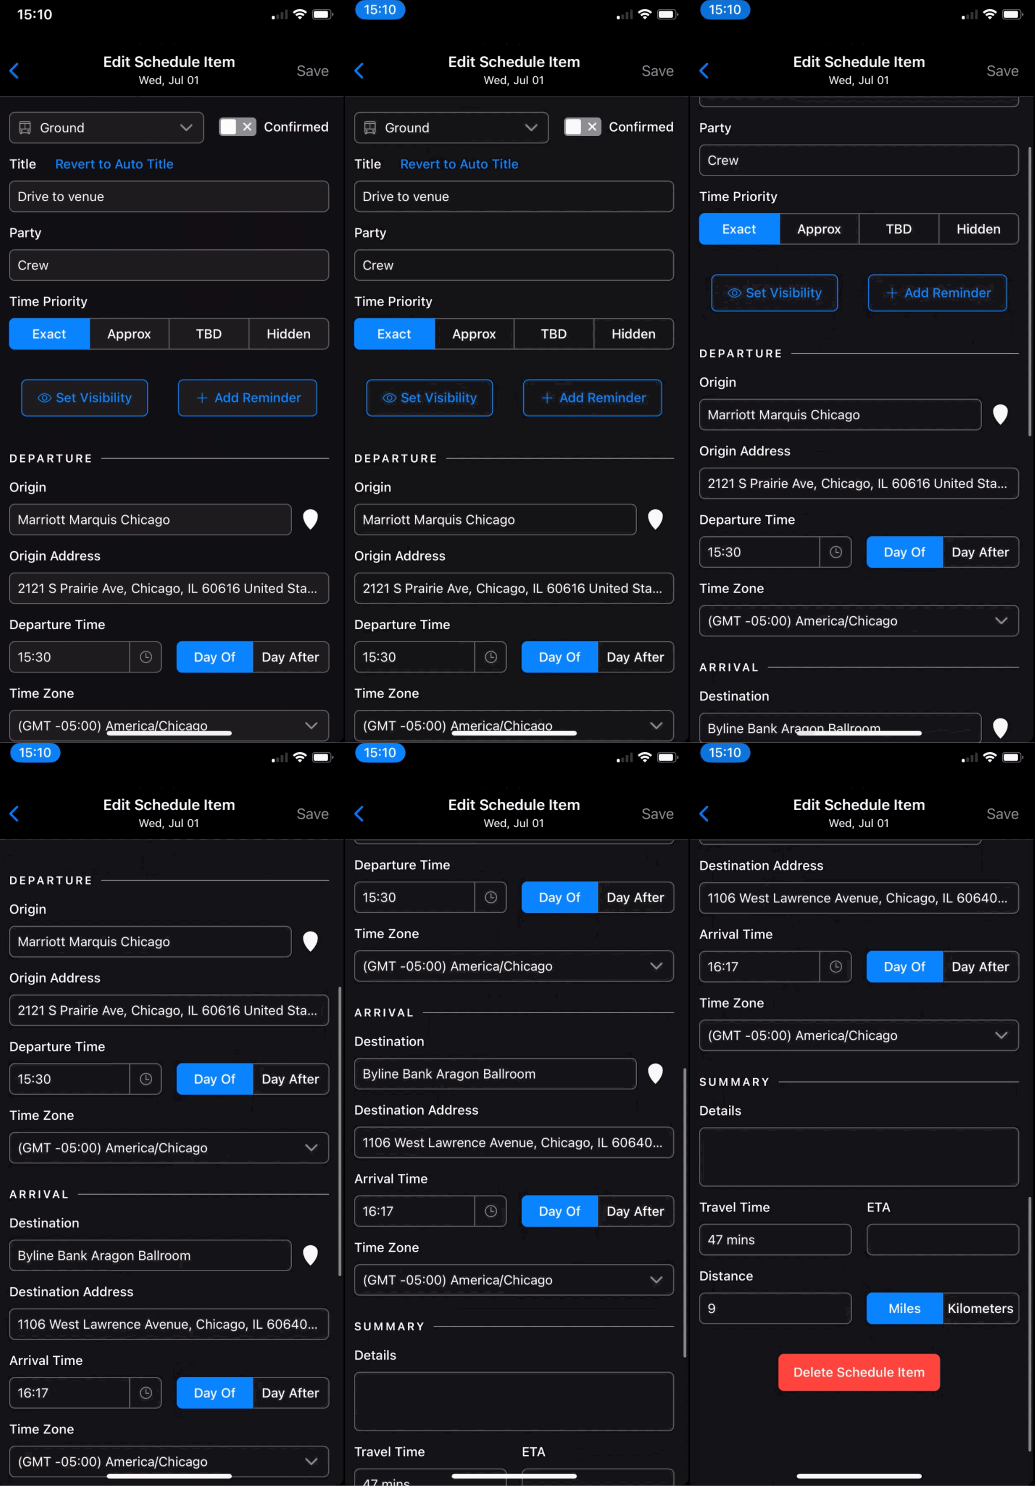
When all relevant information has been entered, click on Save to add it to the schedule for that date.
Adding Rail Travel
Selecting Rail within the item dropdown menu creates a field section below where you can enter information specific to Rail Travel such as Train Number, Rail line, Ticket Status and more of the other fields found in all schedule/travel items.
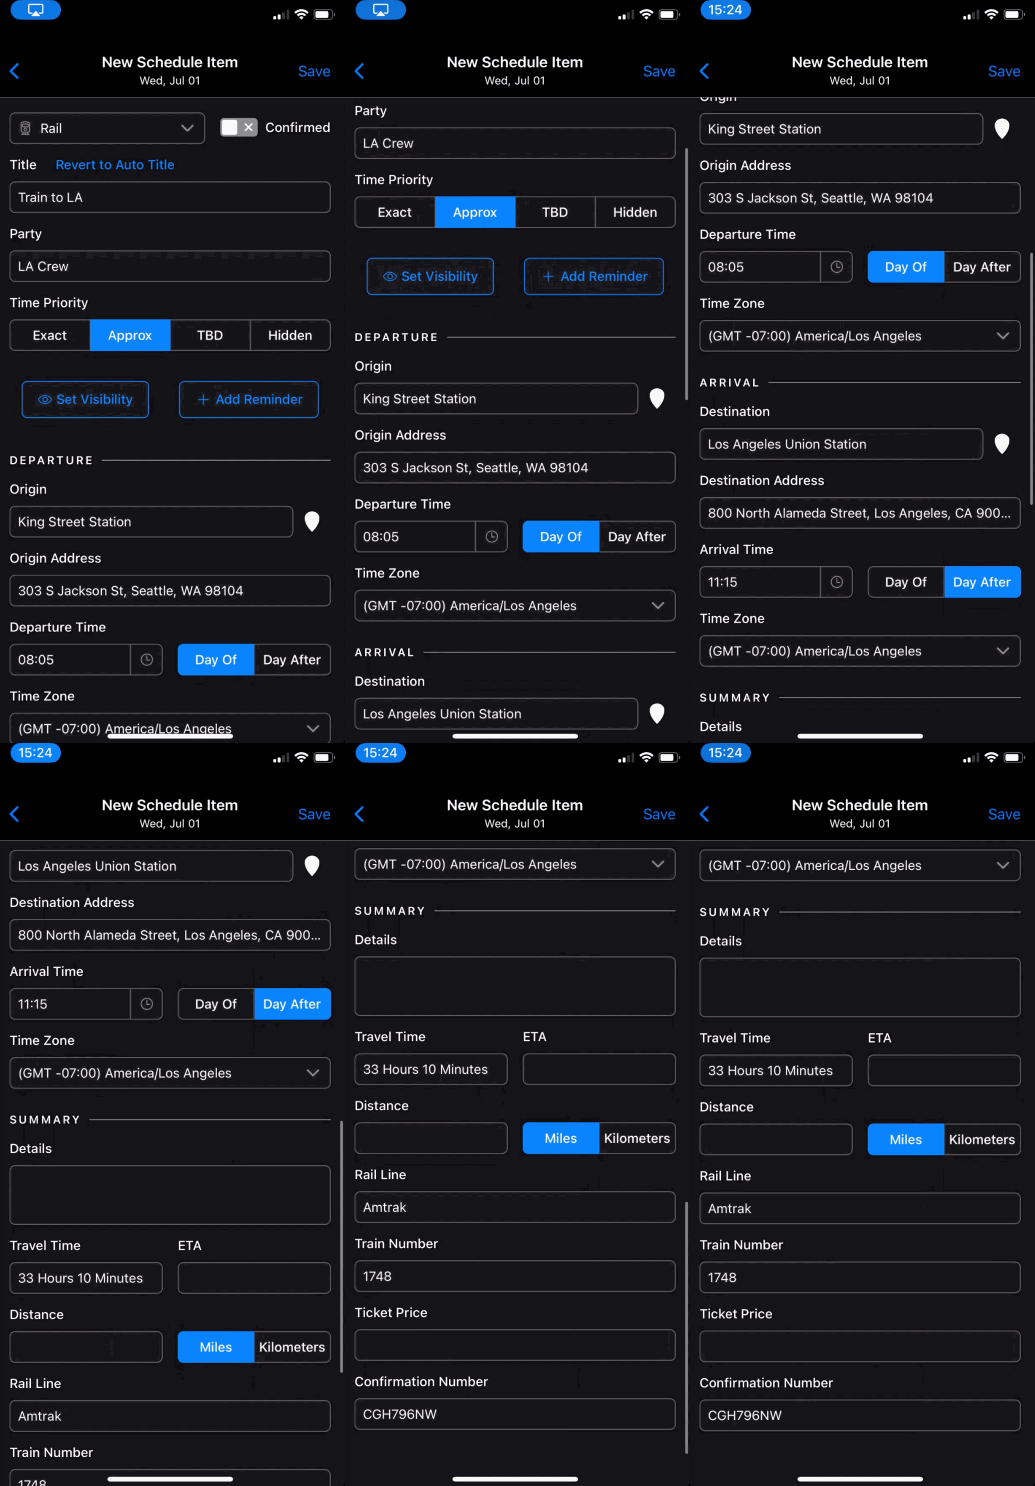
When all relevant information has been entered, click on Save to add it to the schedule for that date.
Adding Sea Travel
Selecting Sea within the item dropdown menu creates a field section below where you can enter general travel information specific to your Sea Travel item.
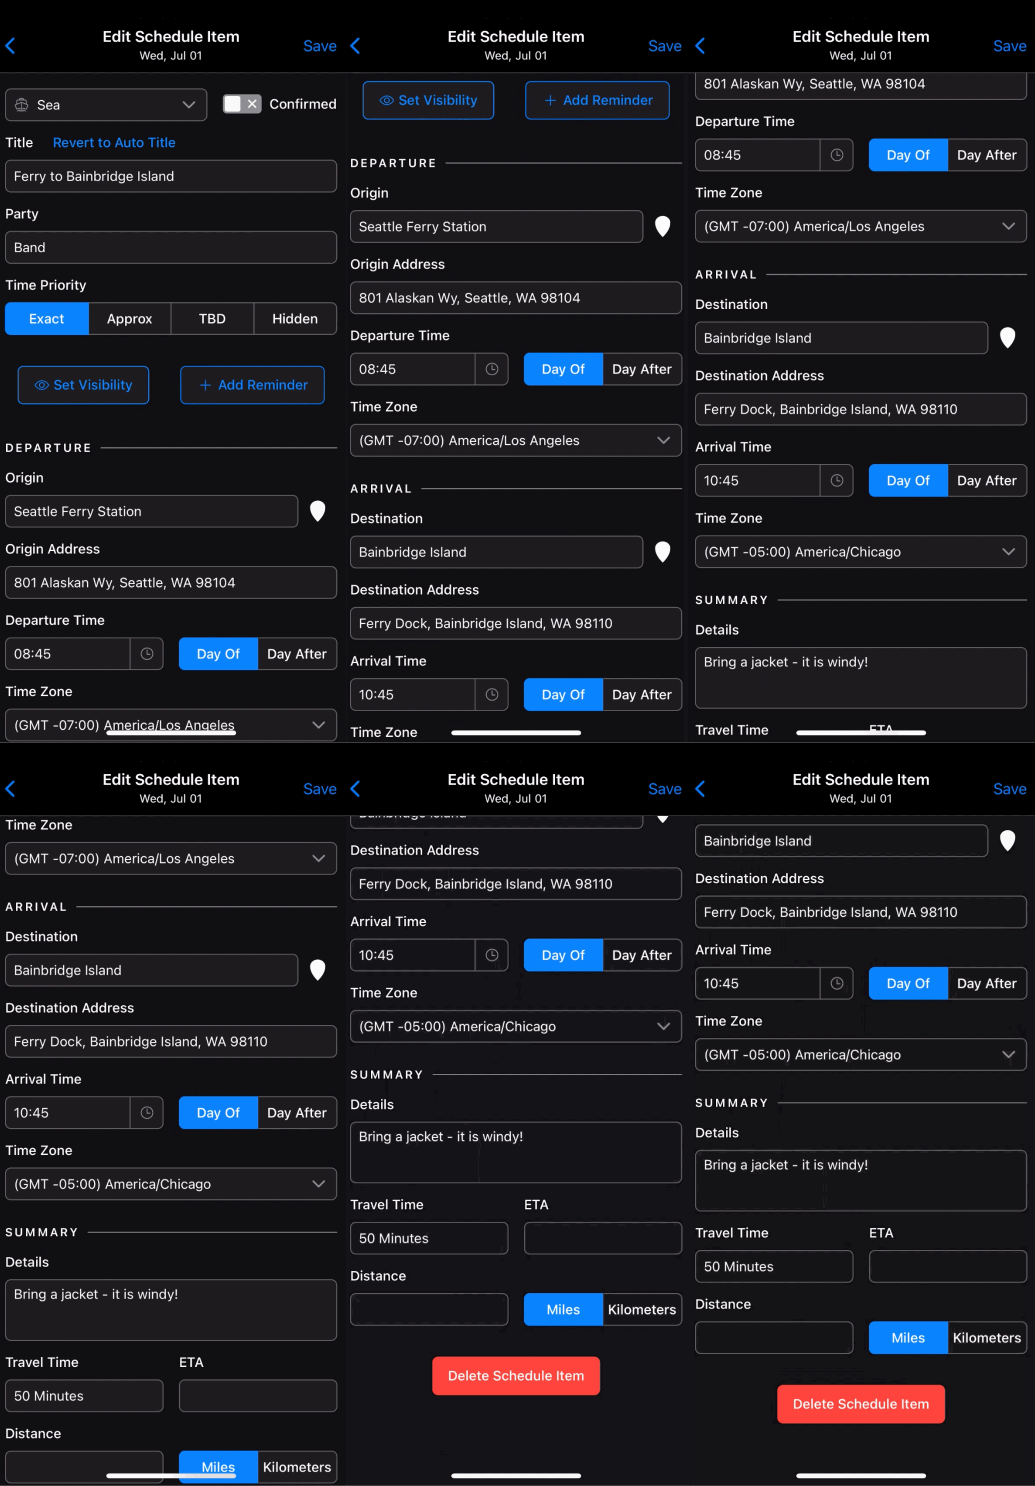
When all relevant information has been entered, click on Save to add it to the schedule for that date.
Adding Air Travel
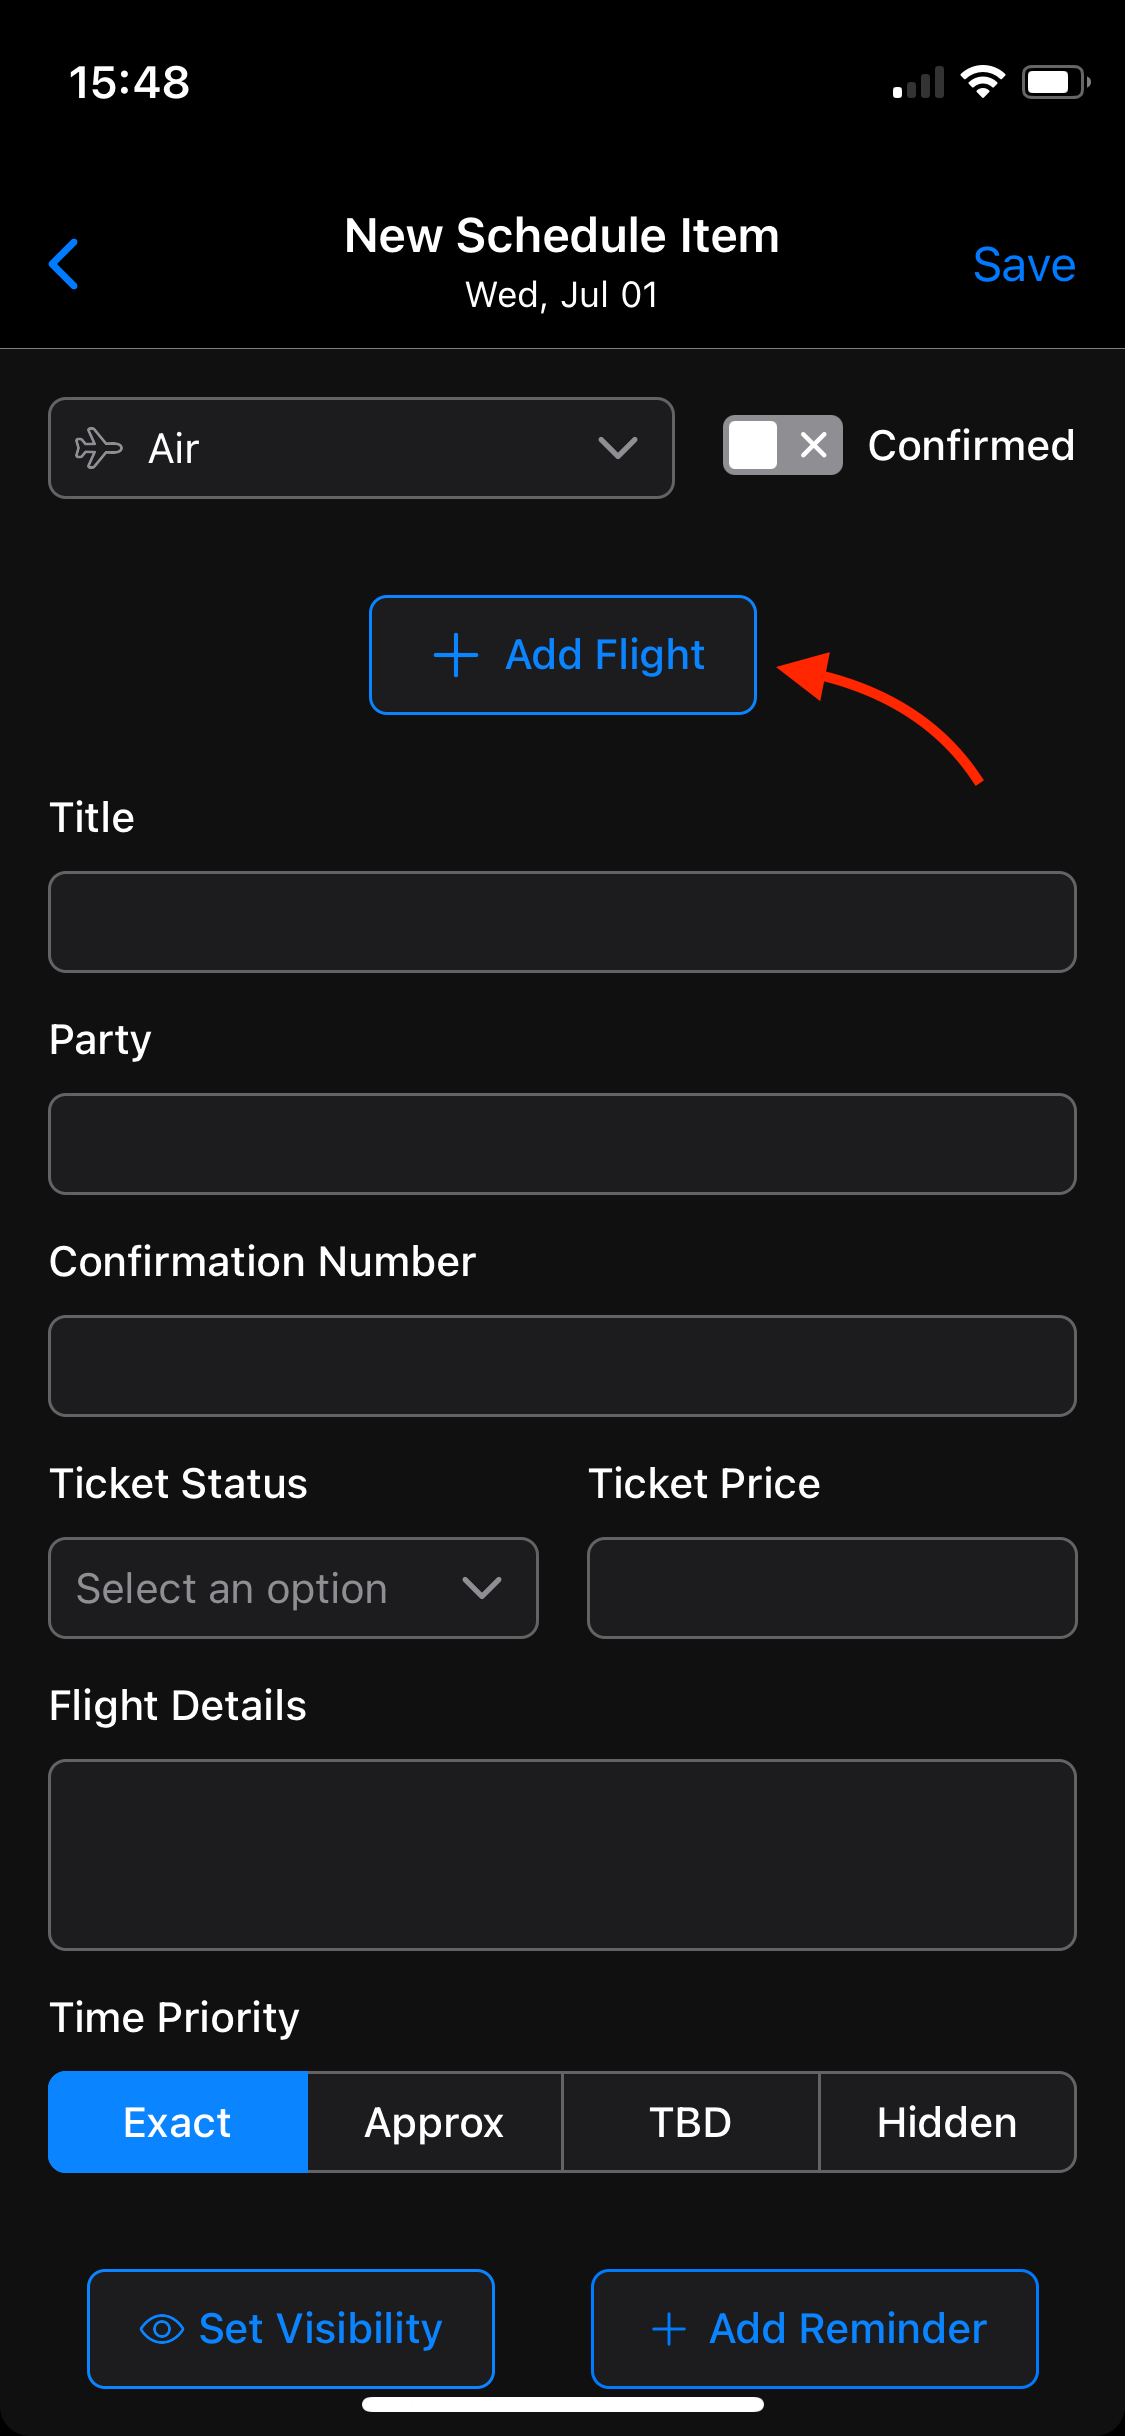
Selecting Air within the item dropdown menu creates a field section below where you can enter information specific to your flight such as Confirmation number, ticket status, ticket price, and flight details.
To add a flight tap on the + Add Flight button.
Adding a Commercial Flight
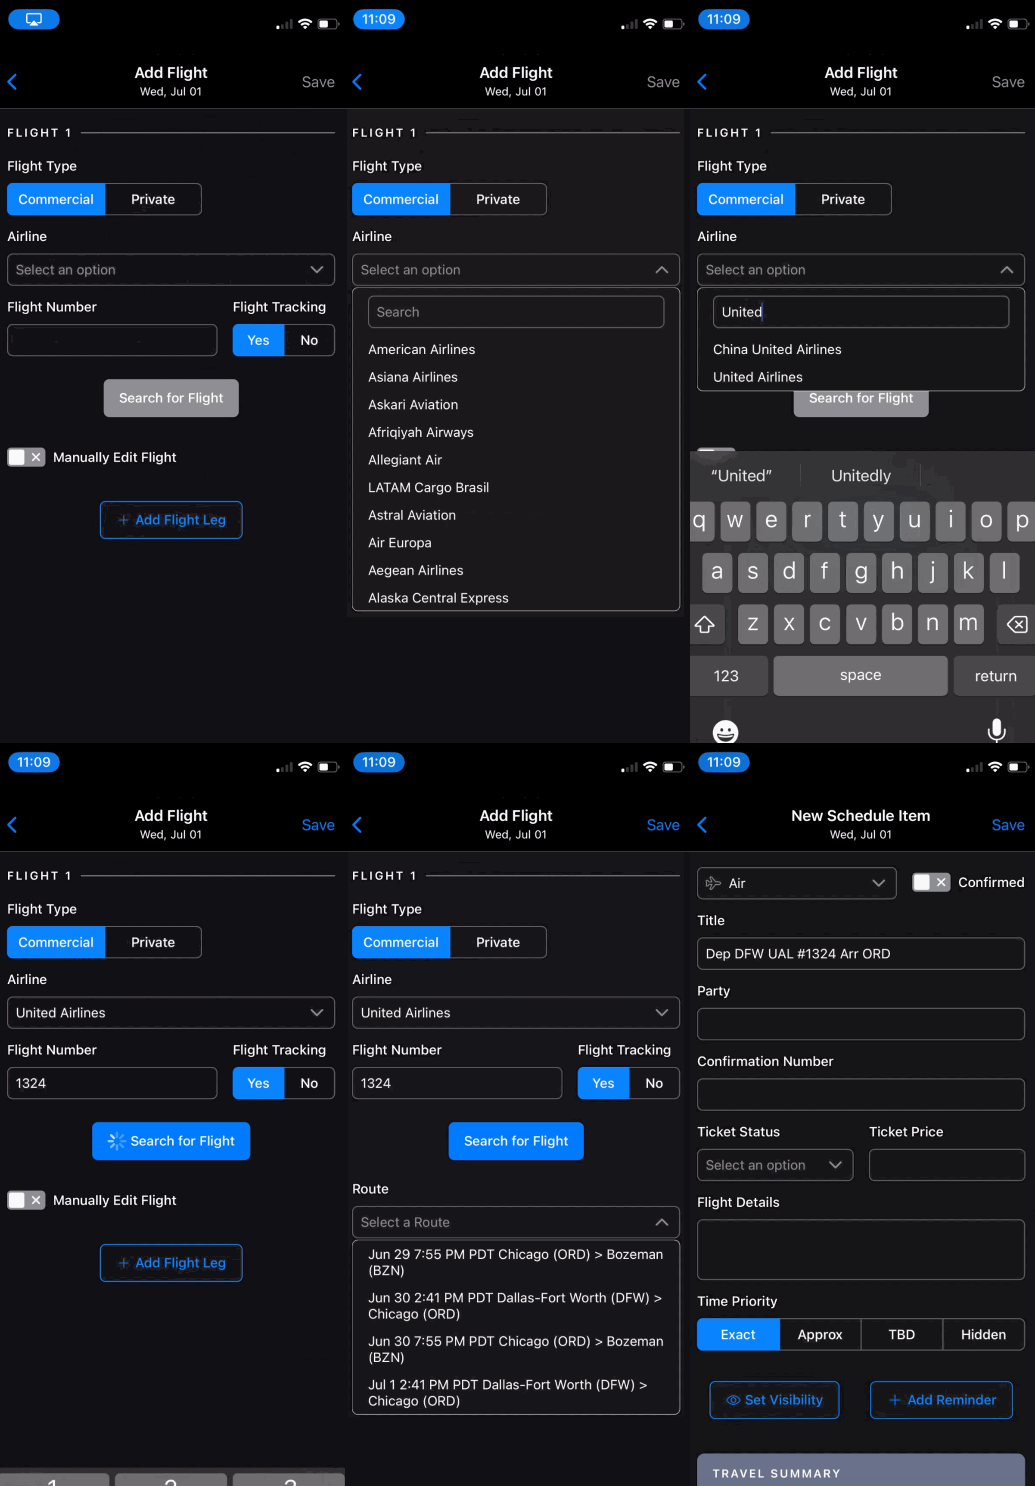
In the next window that appears, you will see fields for a Commercial Flight where you can enter in the airline and flight number to search for your upcoming flight. Select the correct route and tap on Save to add the flight to your schedule.
Adding a Private Flight
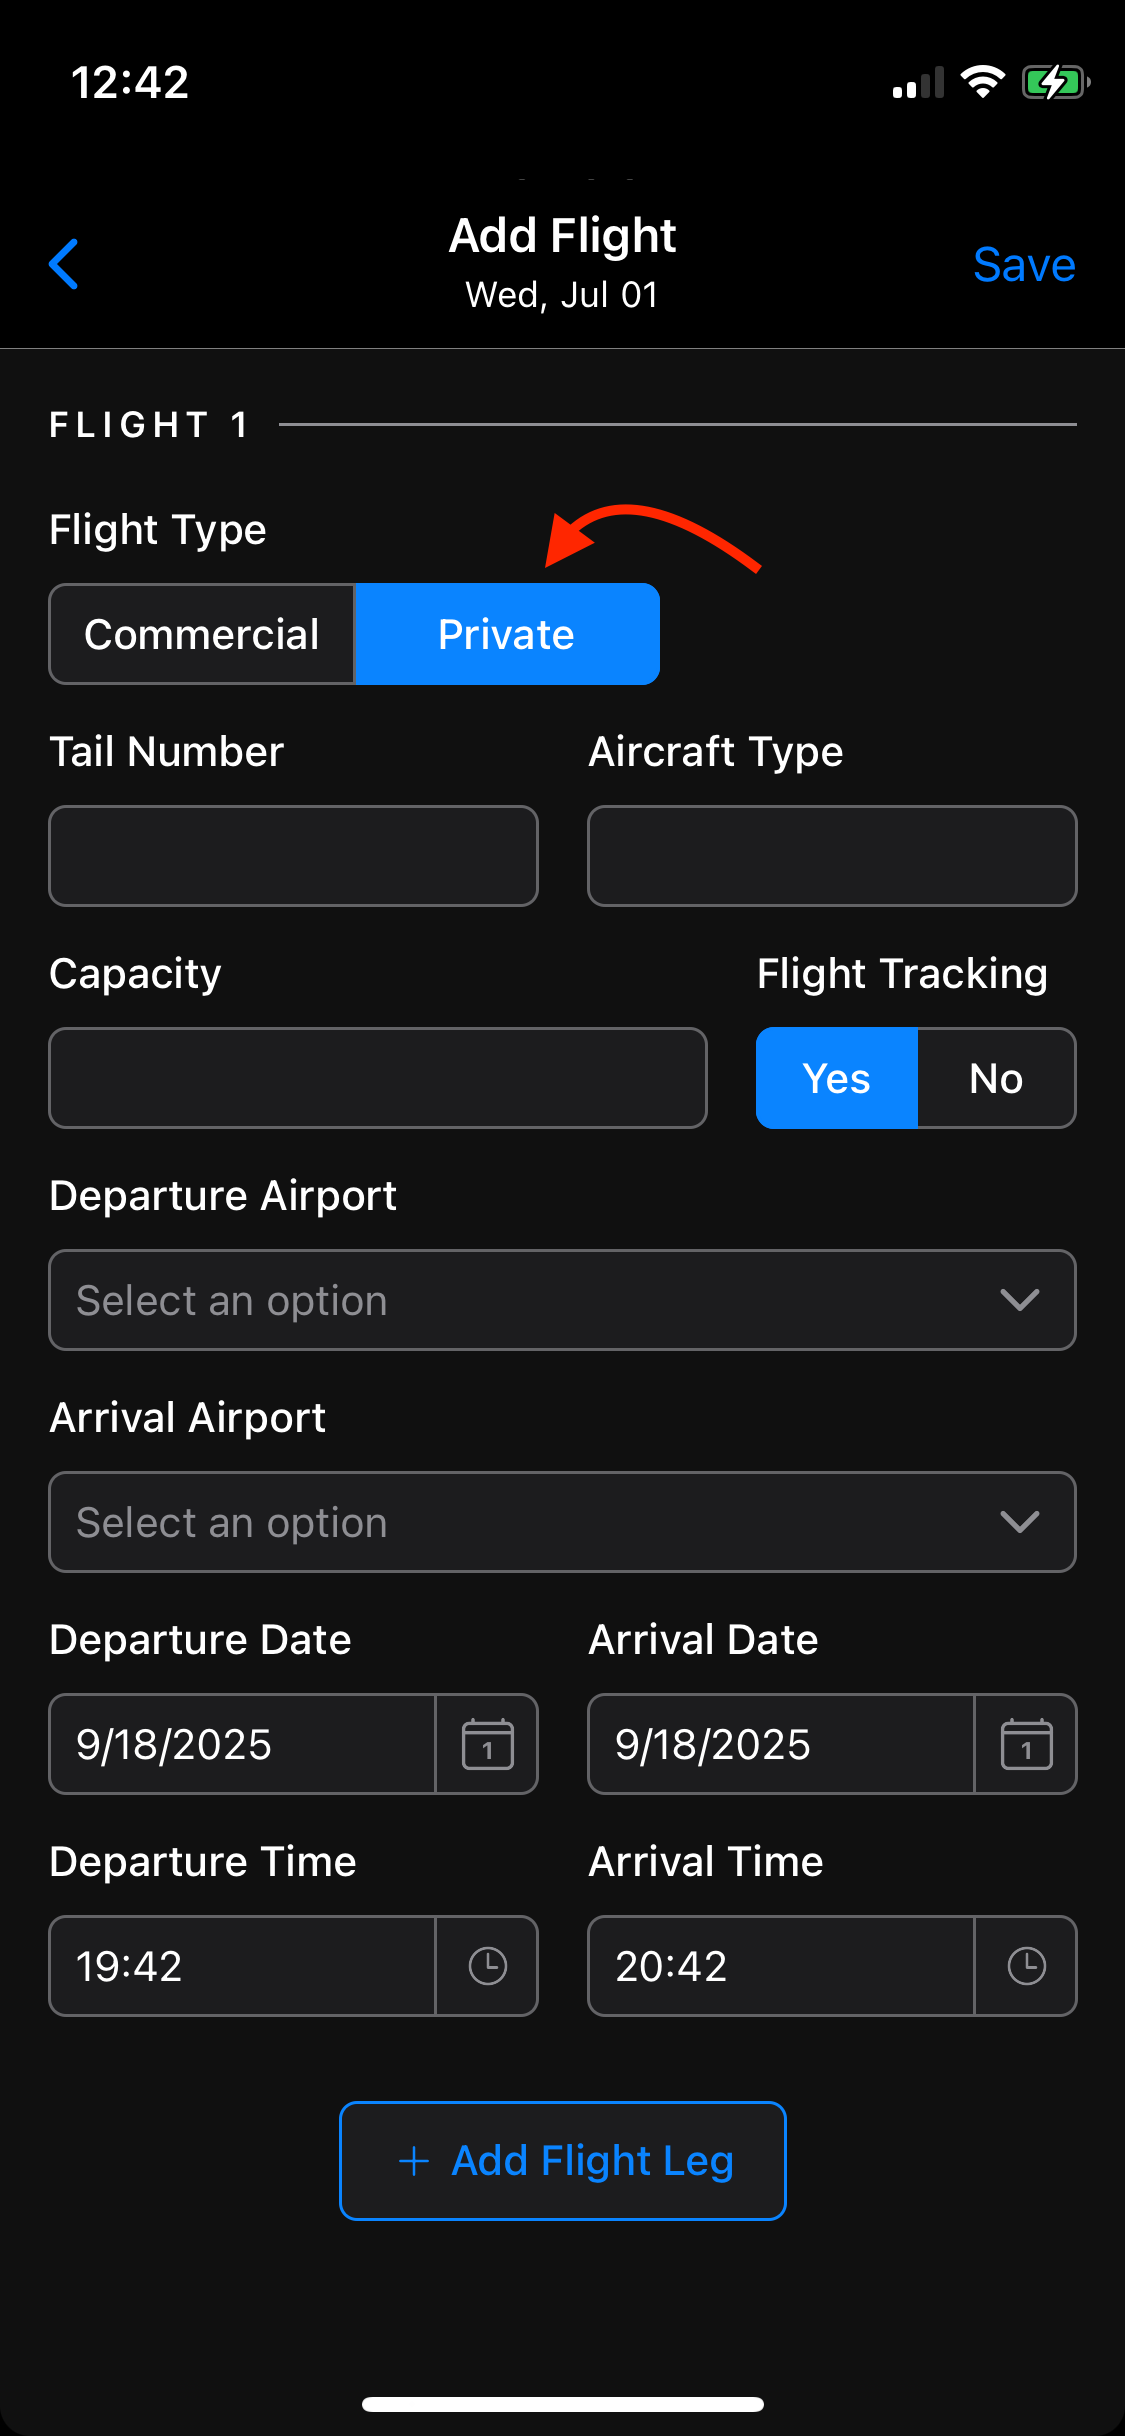
To add a Private Flight, select the Private Flight button, and a new field of information will display where you can enter Tail Number, Aircraft Type, Capacity, and other information relevant to the flight.
Adding Additional Flight Legs
On the chance there is an additional leg for a flight, select the + Add Flight Leg button below to link your connecting flight to the same travel item.
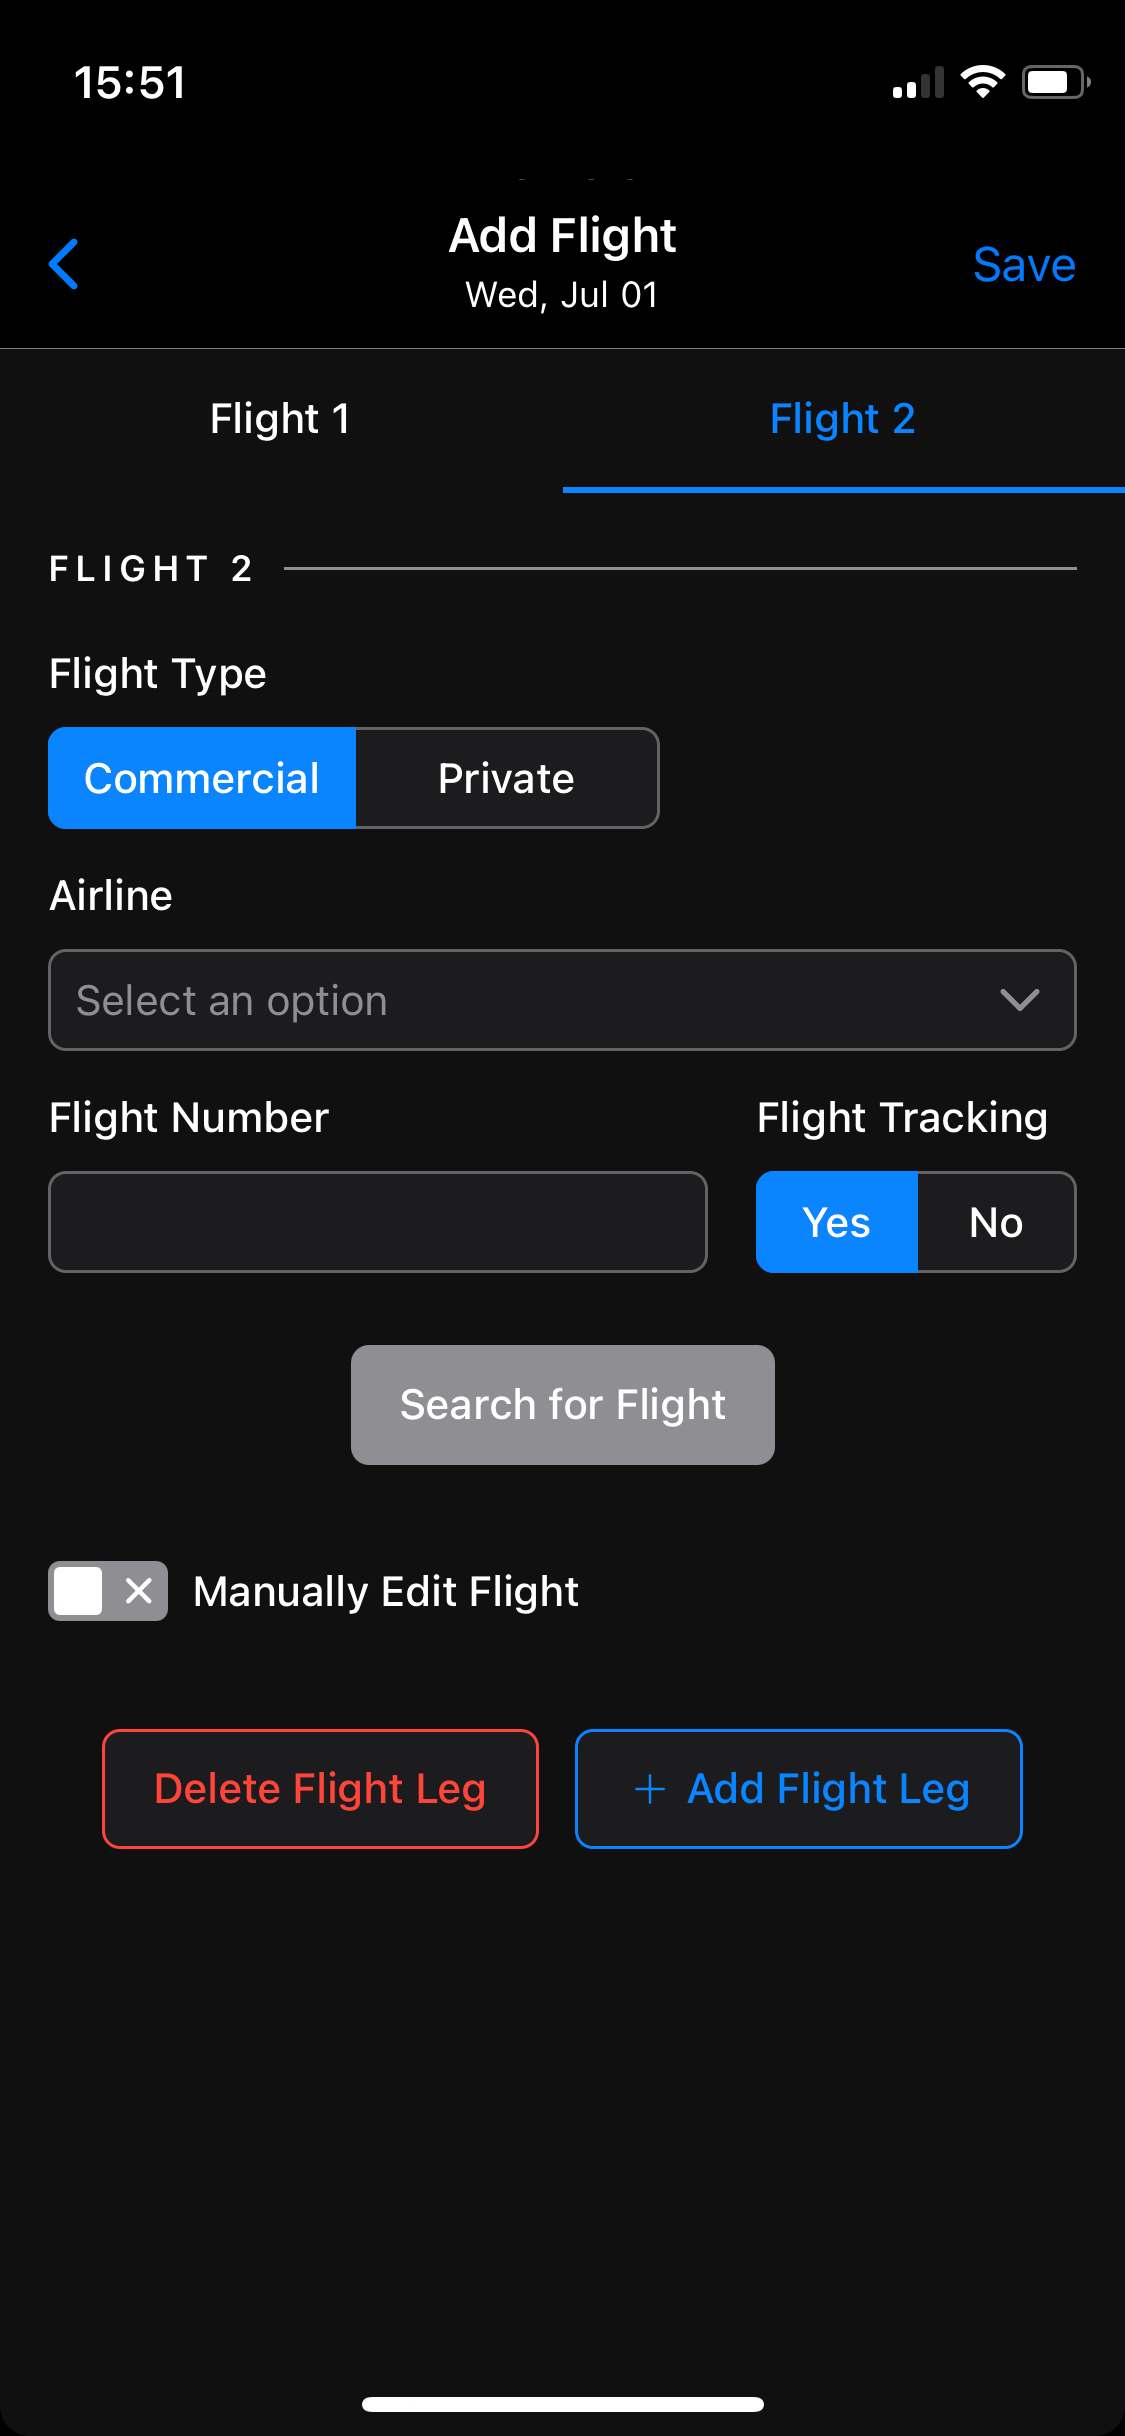
Deleting a Flight Leg
If you need to delete a flight leg, you can do so by selecting the Delete Flight Leg button at the bottom of the screen.
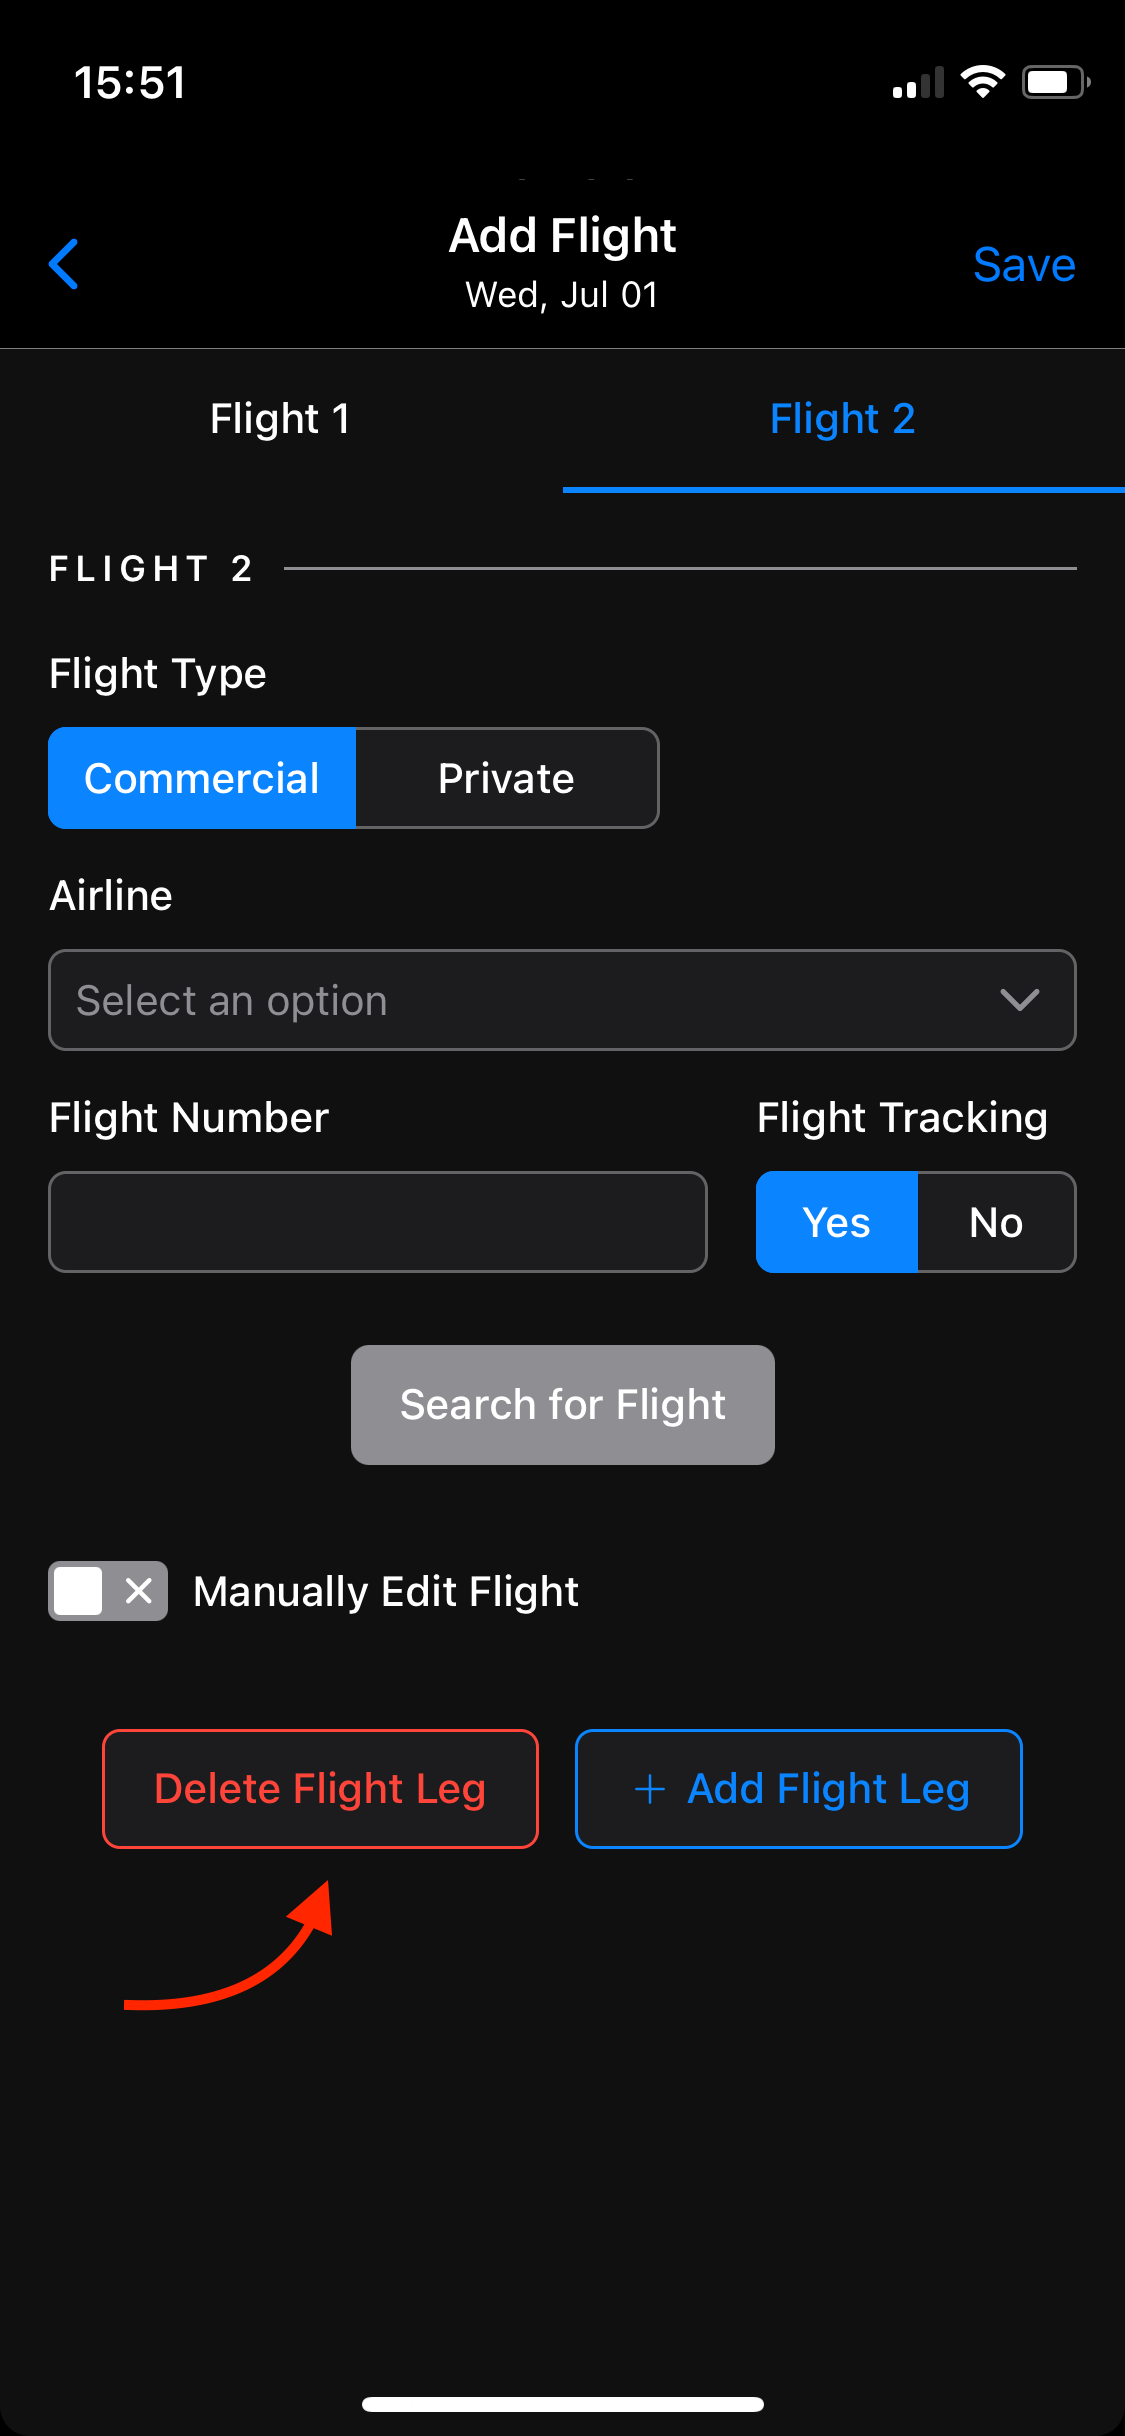
Manually Edit a Flight
Users are also able to manually enter flights by selecting the Manually Edit Flight toggle.
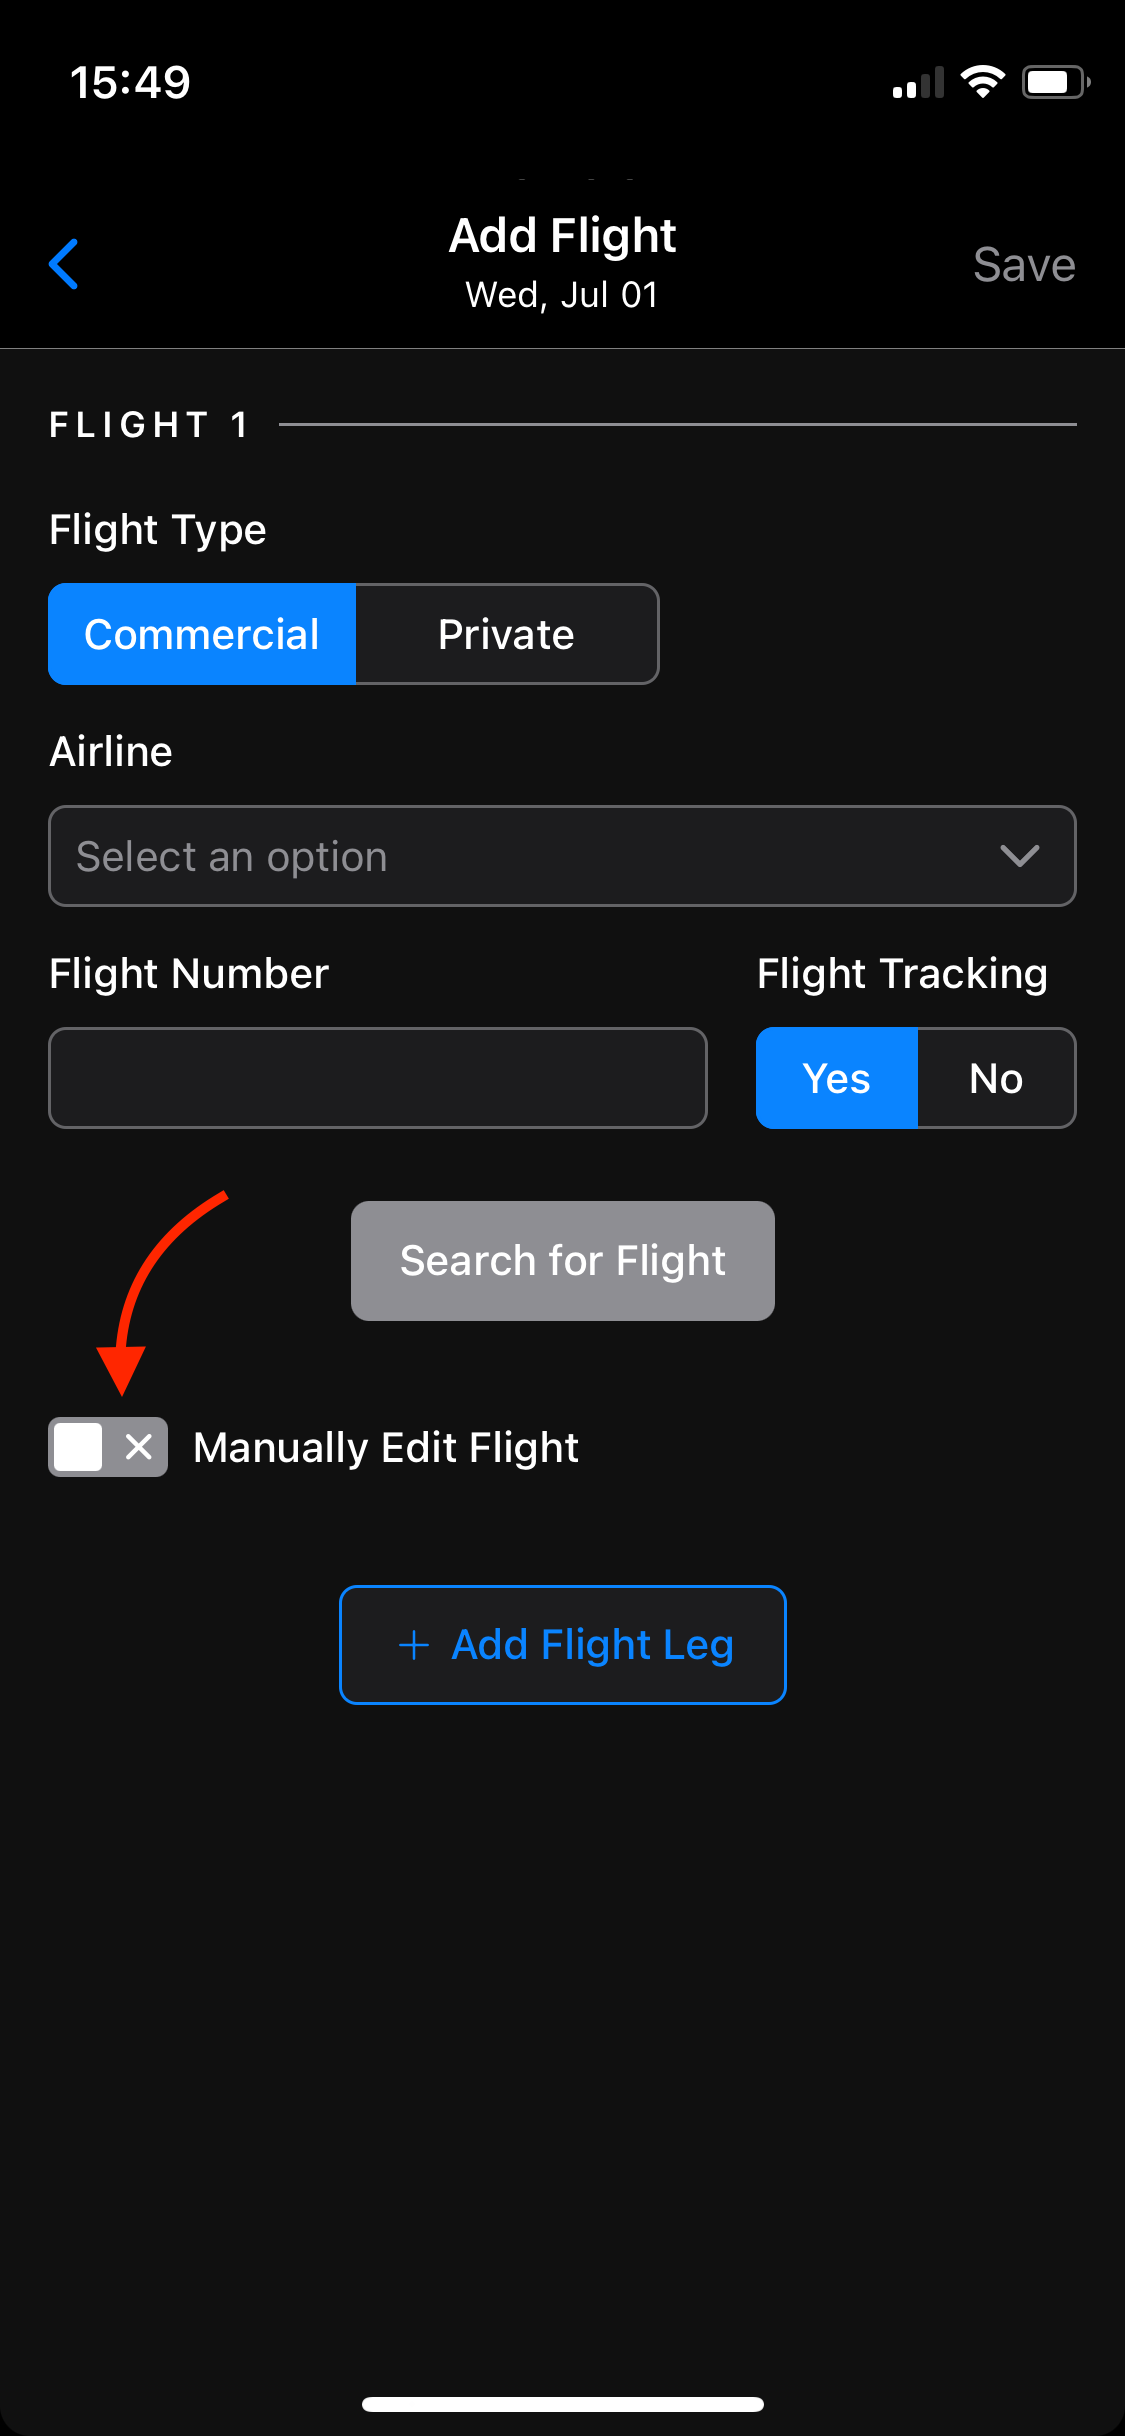
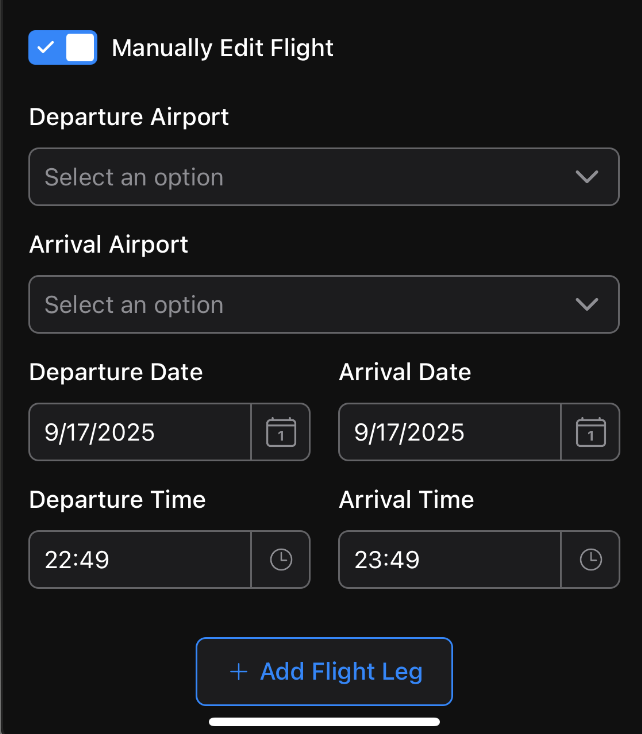
A section of editable fields will appear below where destination and arrival information can be inputted. Additional connecting flights may also be added by selecting the + Add Flight button below the Manual Flight fields.
Understand Auto Title and Custom Title
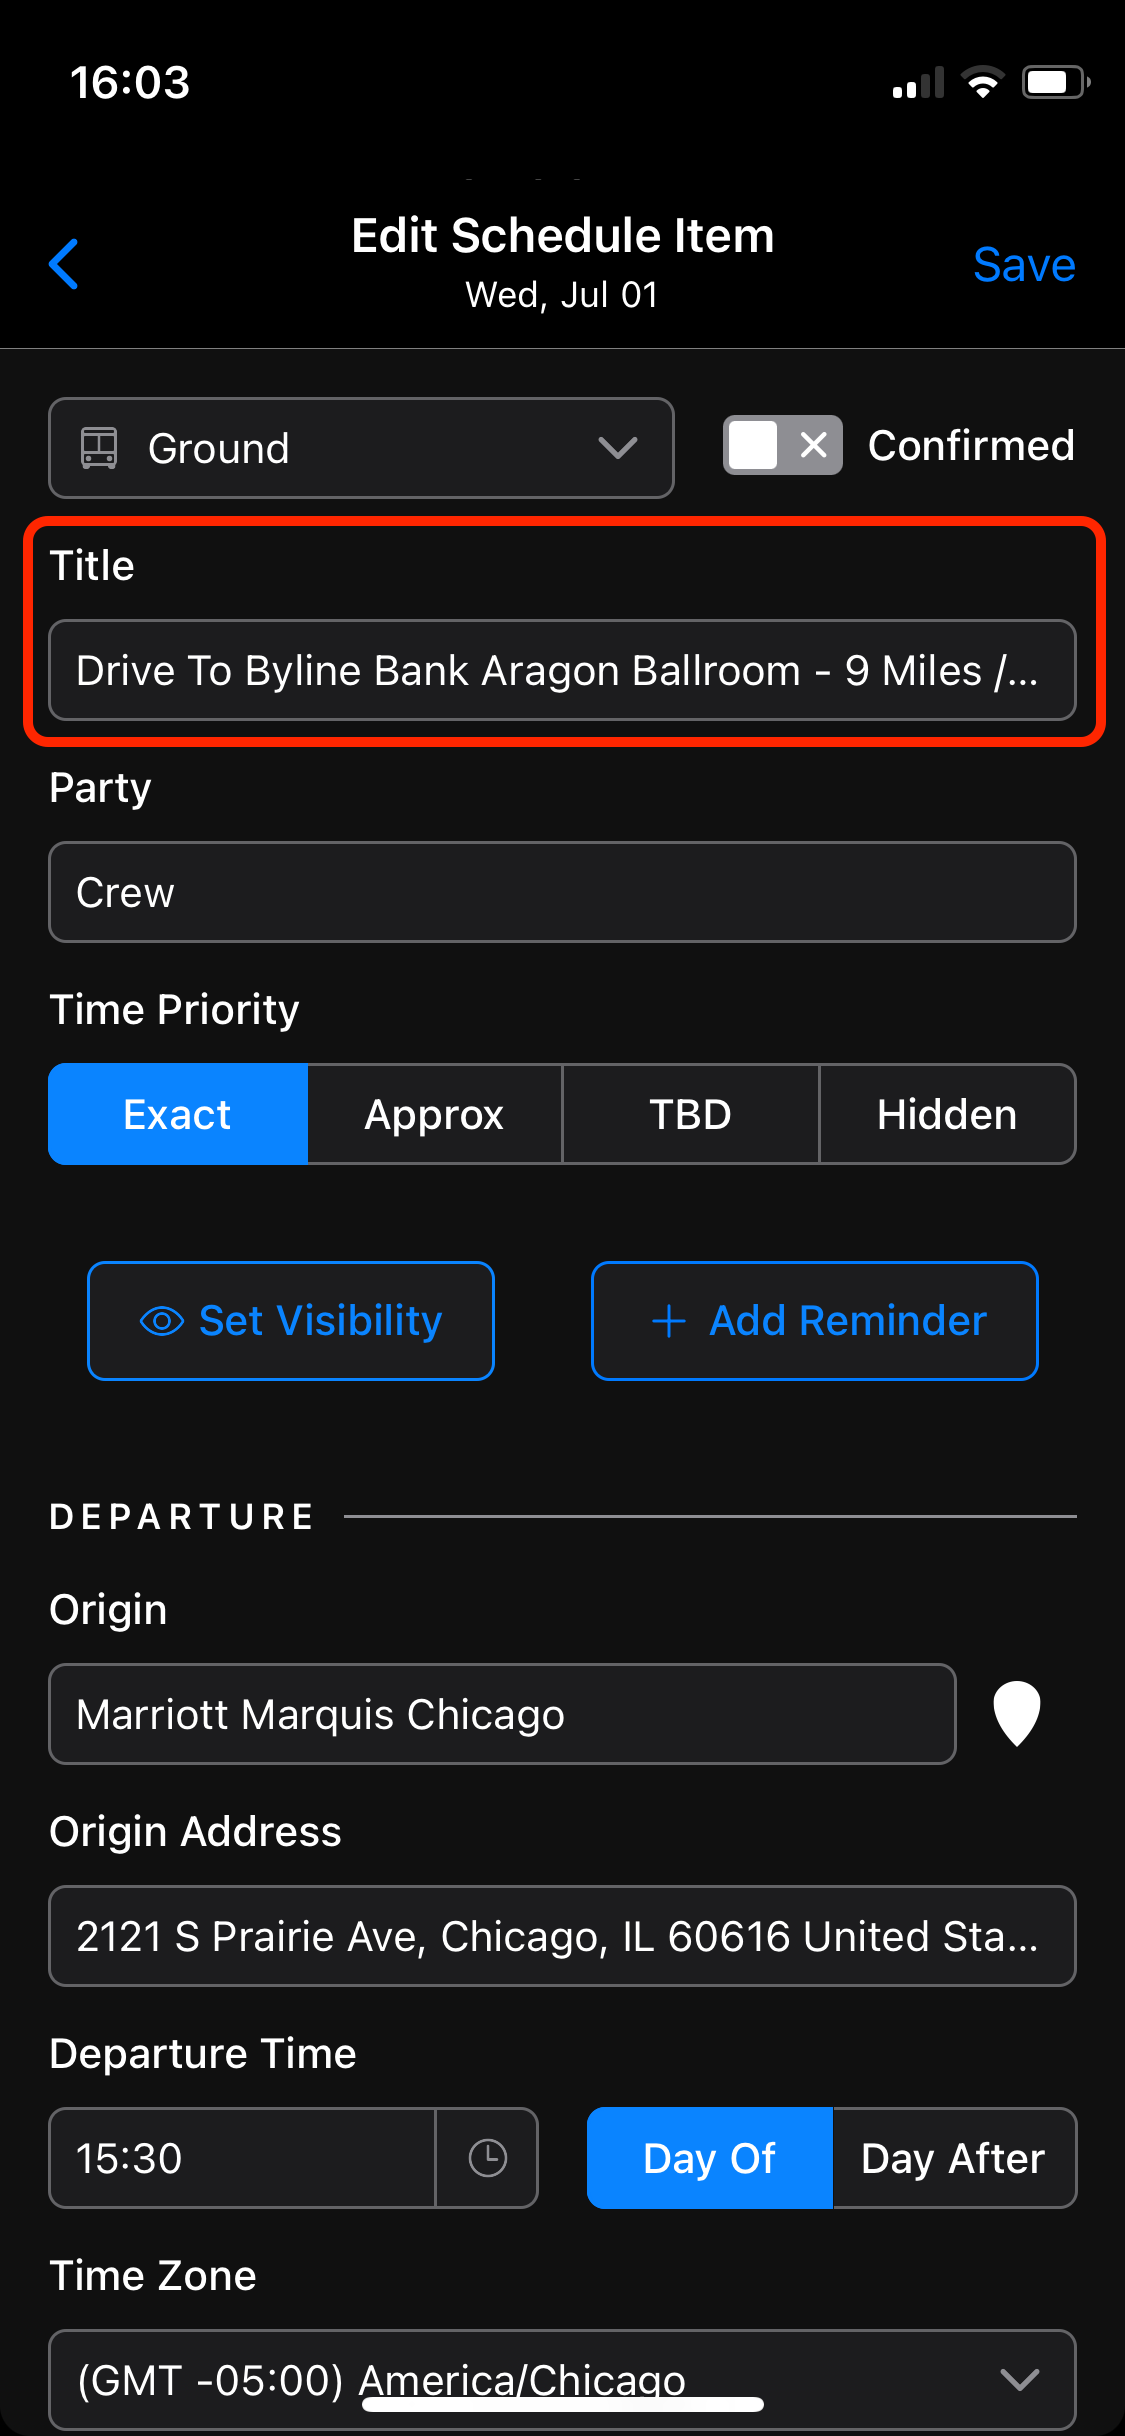
After adding in a new Travel item you can choose to either stay with the auto title, generated by the location and time inserted. You can switch to a Custom Title by selecting into the Title box and entering your own.
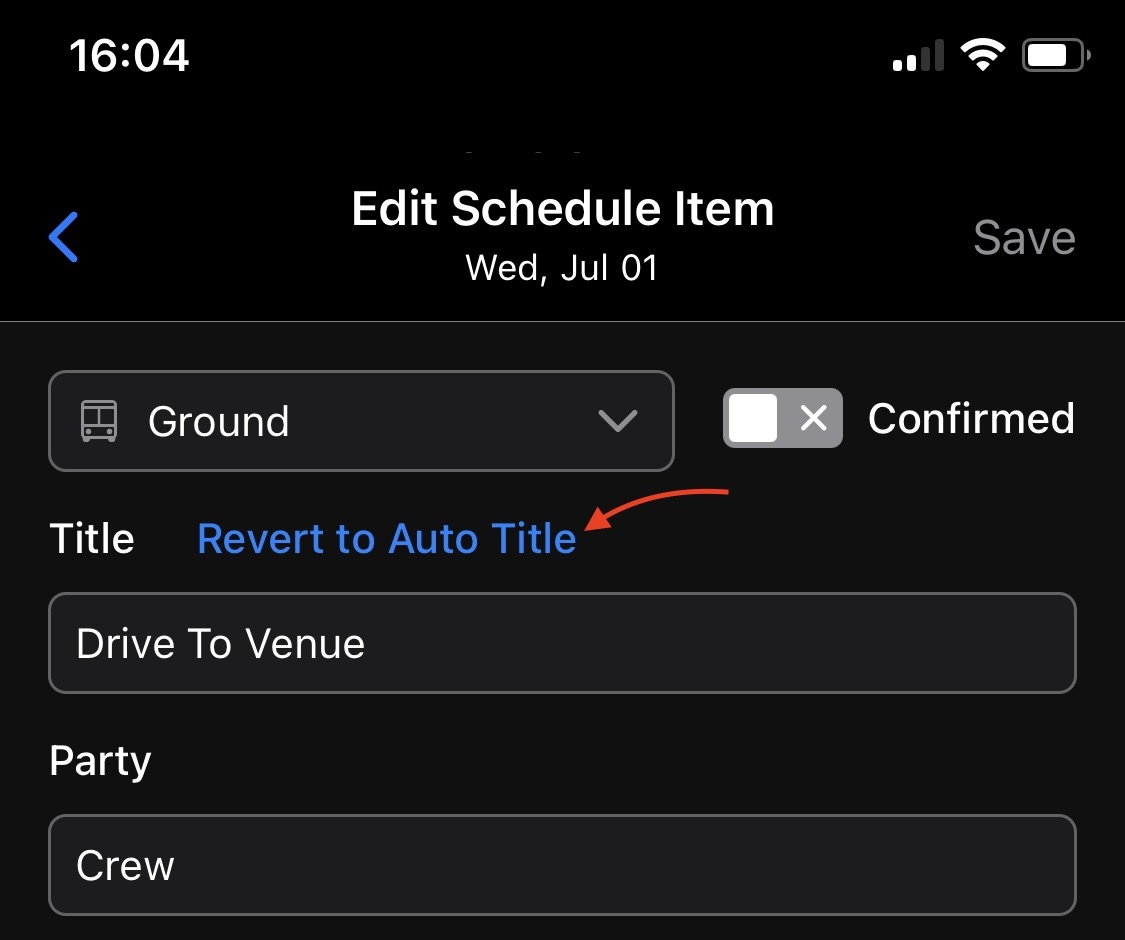
If you prefer to have the Auto Title instead, you can select Revert To Auto Title to bring back the initial title of the travel item.
Understand Confirmed and Unconfirmed
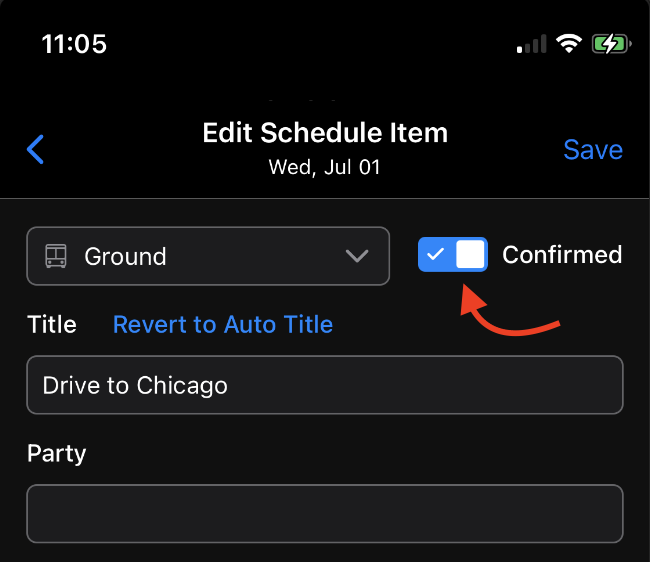
To confirm a travel item, click on Confirmed Checkbox on the upper-right section of your item.
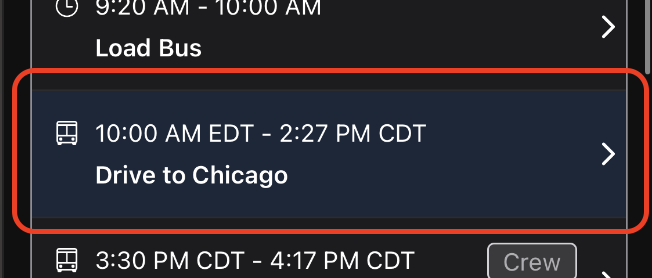
This will allow it to be highlighted in the mobile app to indicate its status as confirmed.
Use Time Zones
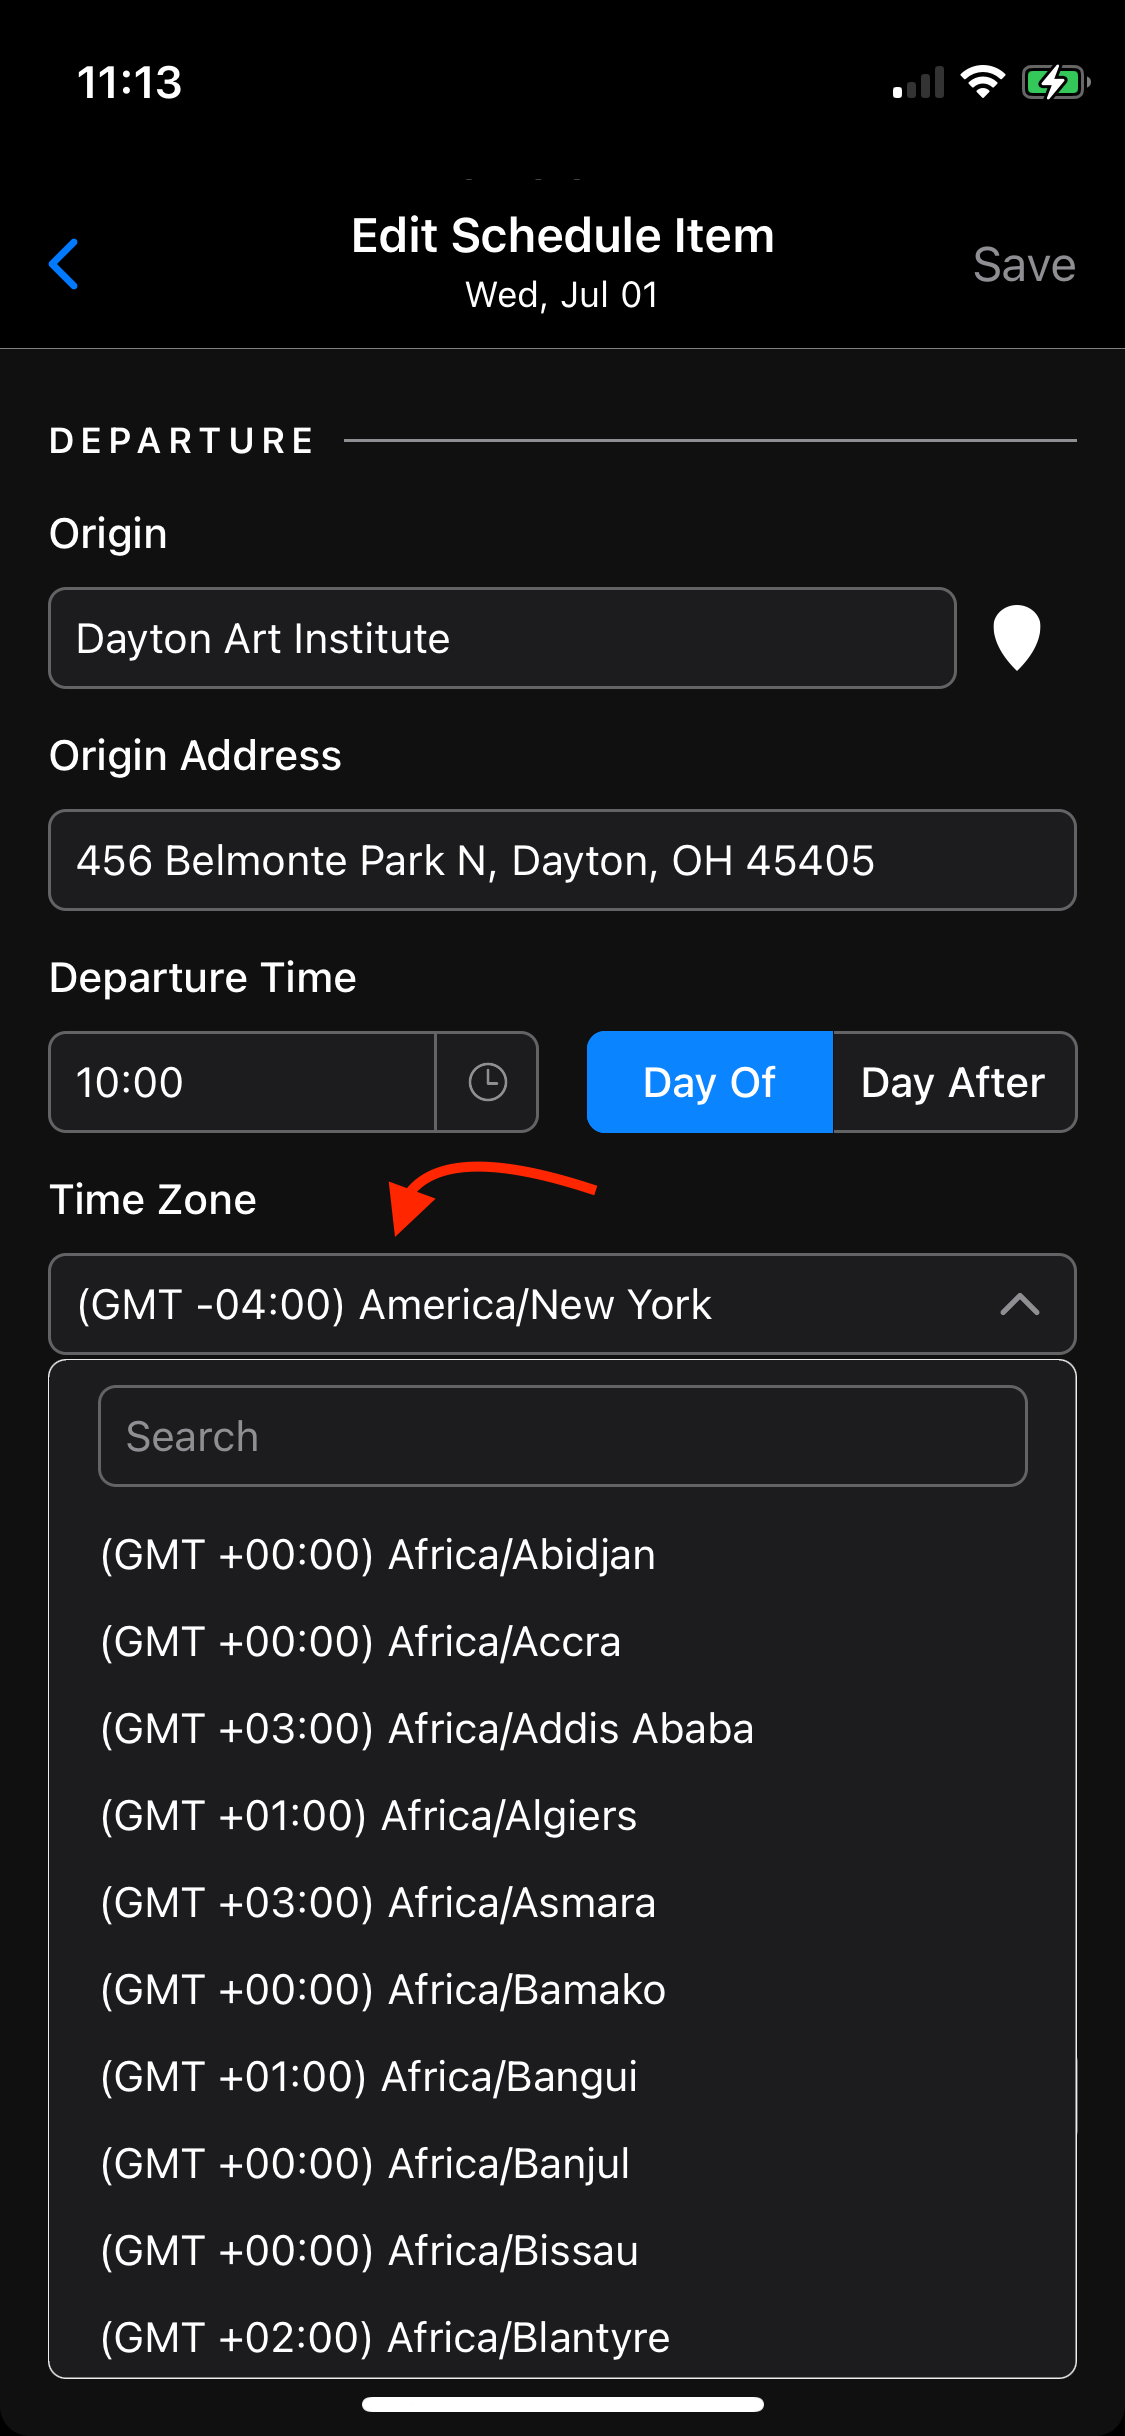
You are able to set time zones for your travel items that may occur in a different time zone than the location of your selected date, or for travel items that cross into different time zones from the departure/arrival location.
To select a timezone for you origin/arrival location of the travel item, select the Time Zone dropdown menu. Here you can either scroll to select the appropriate timezone, or use the search bar function to find the correct timezone for your travel item.
Enter Times and Set Day Of or Day After
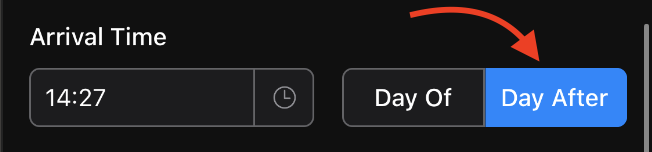
Users are able to add travel items that cross into another date, and specify that in the arrival/departure time of the travel item. To change an item's arrival or departure to be on the following day, tap on the Day After button found next to the time selector.
Assign Parties to Travel Items
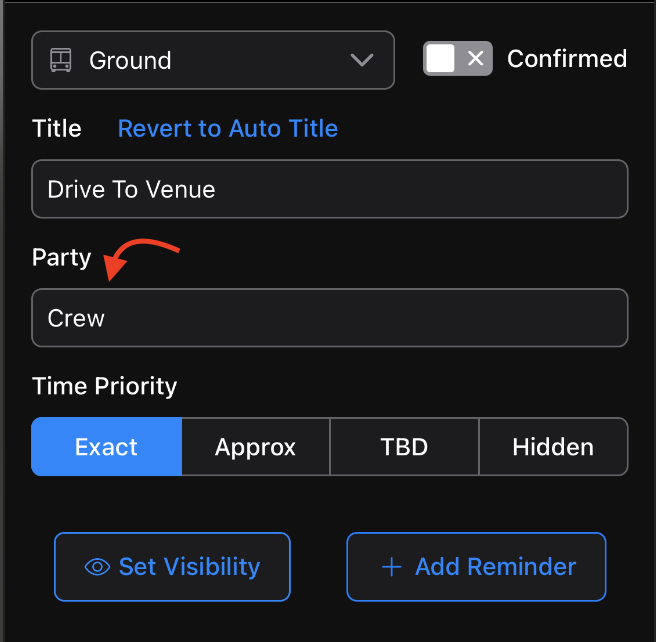
To assign a party to a travel item, you can enter the title of the person/group the item is dedicated towards in the Party text section.
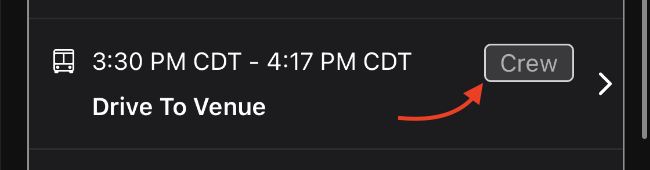
This will place a label next to the travel item with the Party title shown.
Set Visibility
Users can apply Visibility of a Travel Item to either a single User, a Group of Users, or any combination of Users and Groups. Whoever is listed in the visibility setting will have the ability to view that specific schedule item. Keep in mind that if a User has Manager permissions or higher, they will still be able to see all Schedule Items on Tour Dates.
By default, all new Travel Items are visible to all Users in your Organization. This means that if your Tour is marked as Visible and you add a new Travel Item to a Tour Date, all Users added to your Organization will be able to see that new Travel Item until you apply a Visibility setting to it.
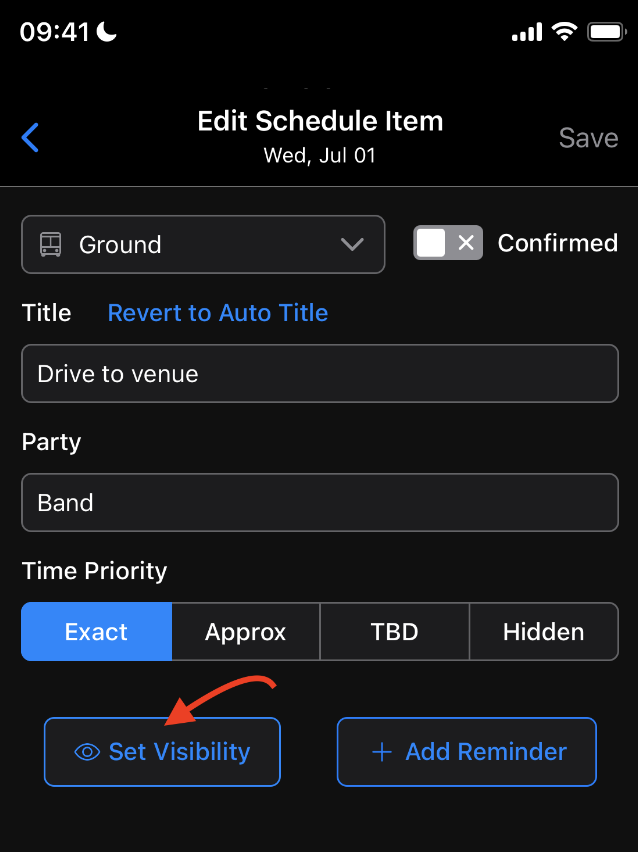
You can add visibility to your Travel Item by selecting the Visibility option within the editing section of your Travel Item. Inside there you can select the users and/or user groups that are permitted to view the Travel Item.
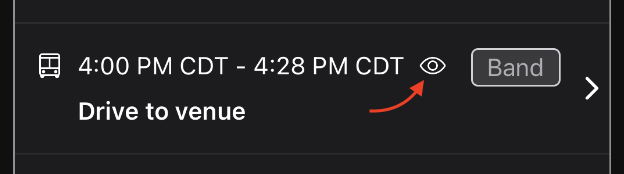
Travel Items that have Visibility set will appear with an Eye icon on the right side in the schedule list view:
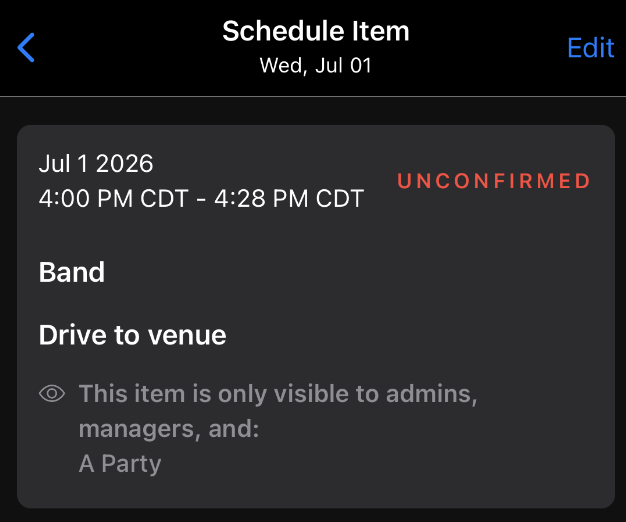
If you click on a Travel Item with Visibility applied, you'll see the Groups and/or Users that have Visibility in the Schedule Item's detail:
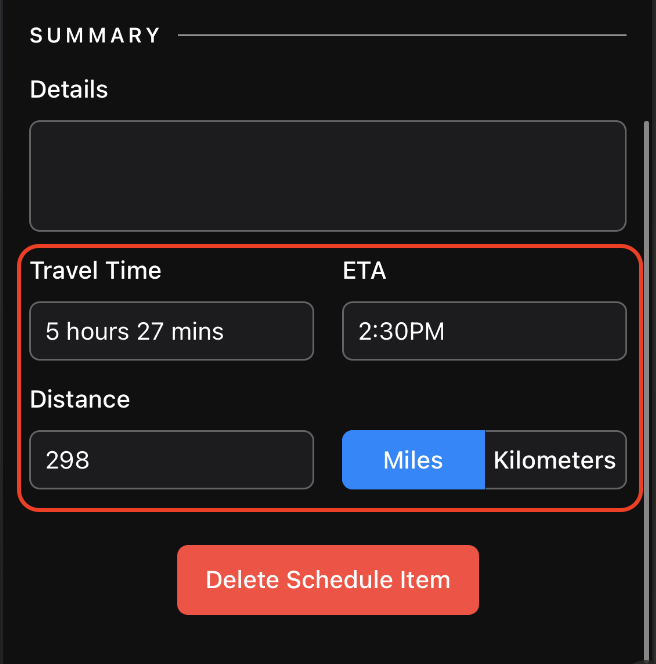
Set Travel Time, ETA, and Distance
At the bottom of the editing section for your travel item, you can enter the Travel Time, ETA, Distance, and any other Details needed for the item as well.
Use Travel Notes
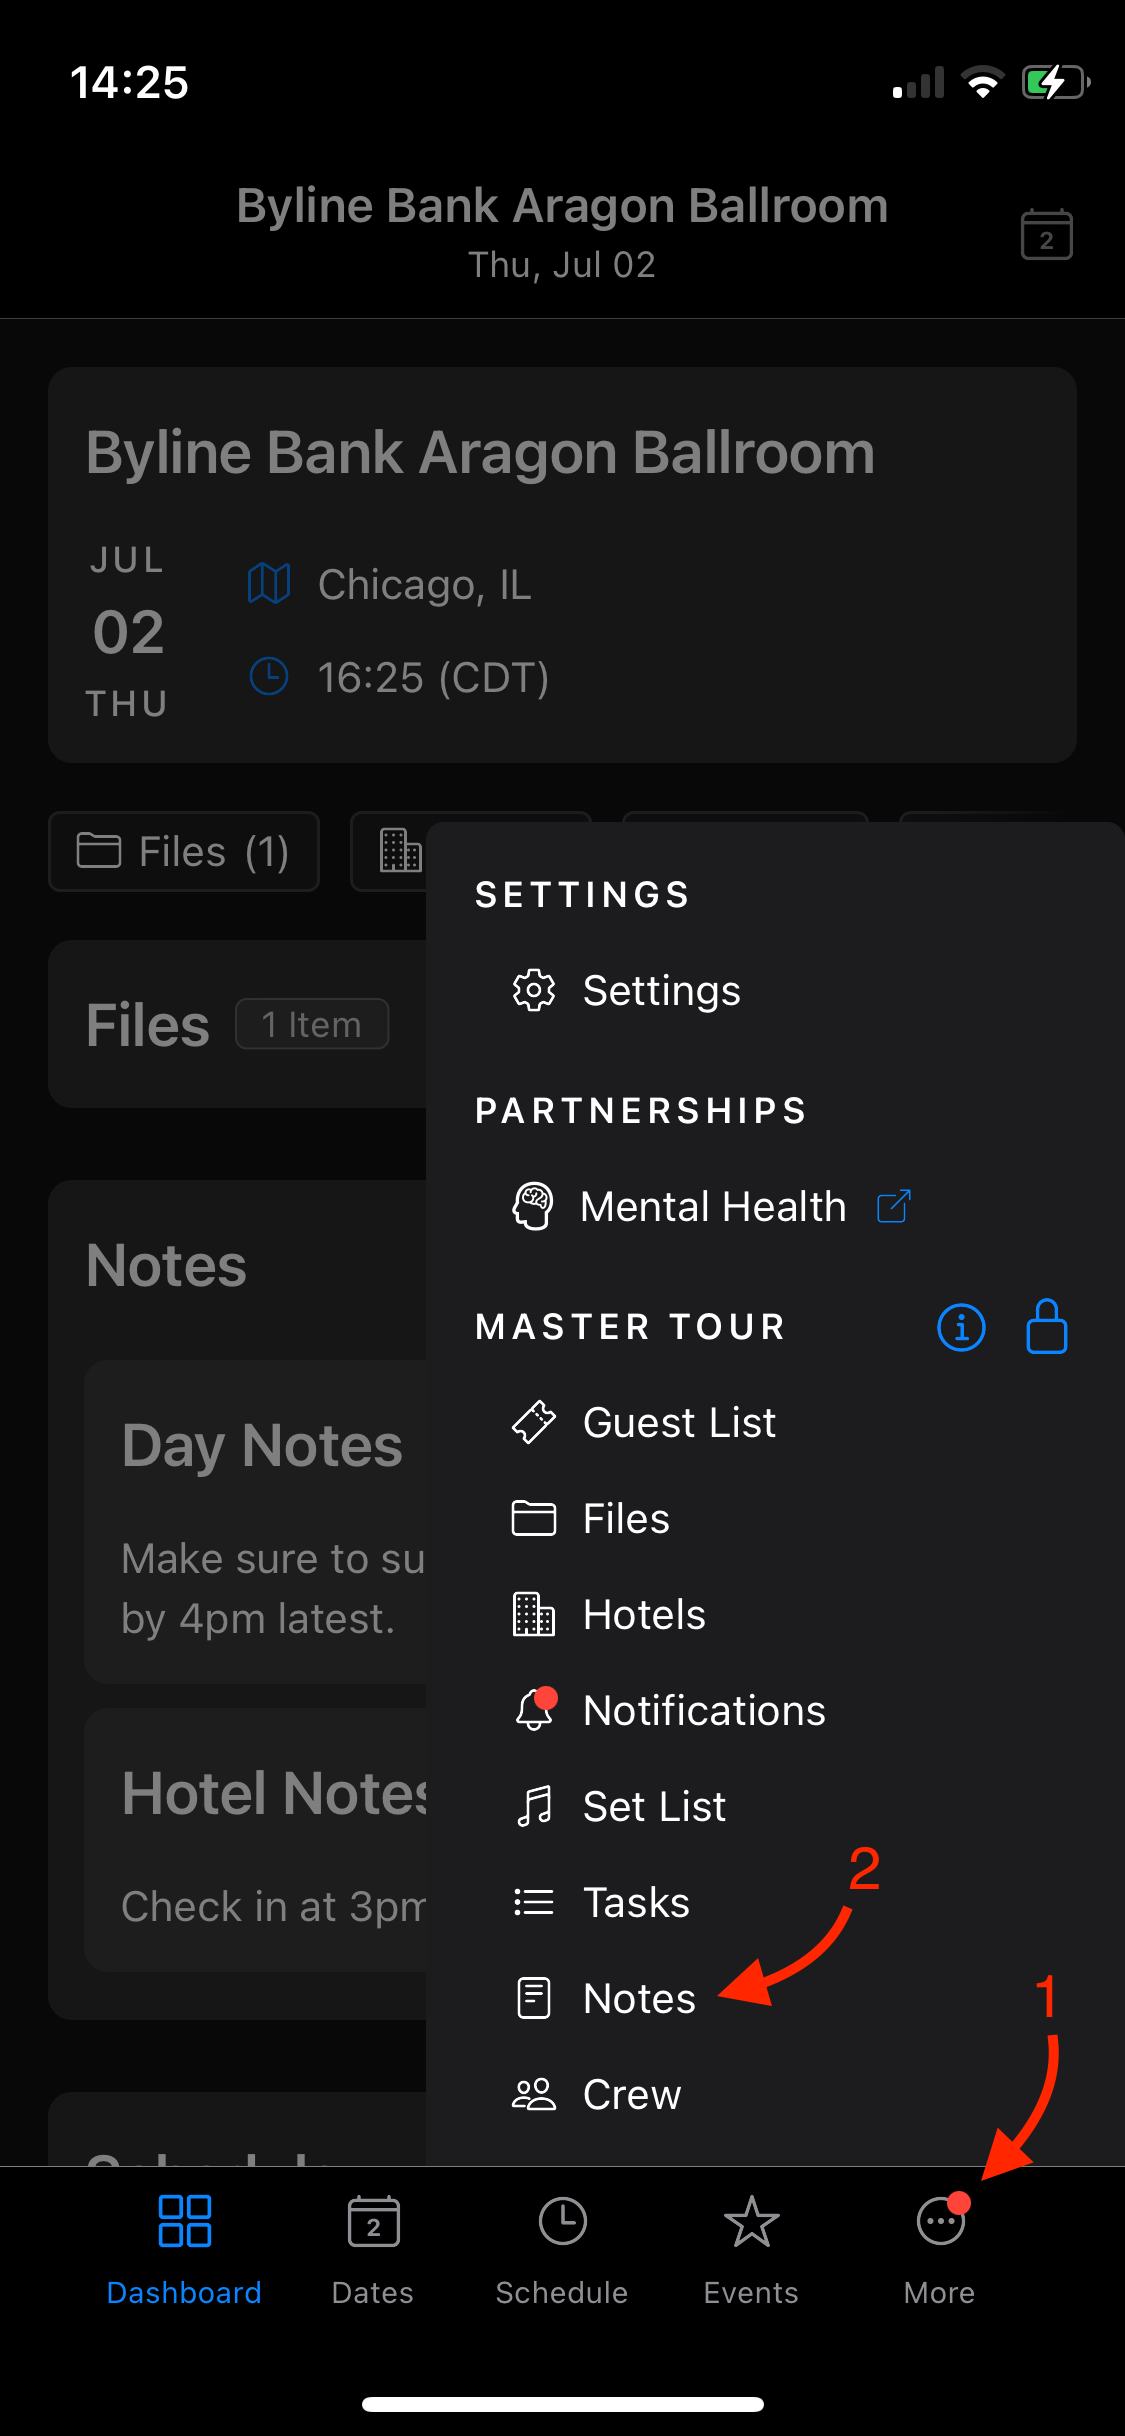
Just like your daily notes, there is a Travel-specific Notes field. You can find this by tapping on the More button in the bottom of your navigation bar, and selecting the Notes section.
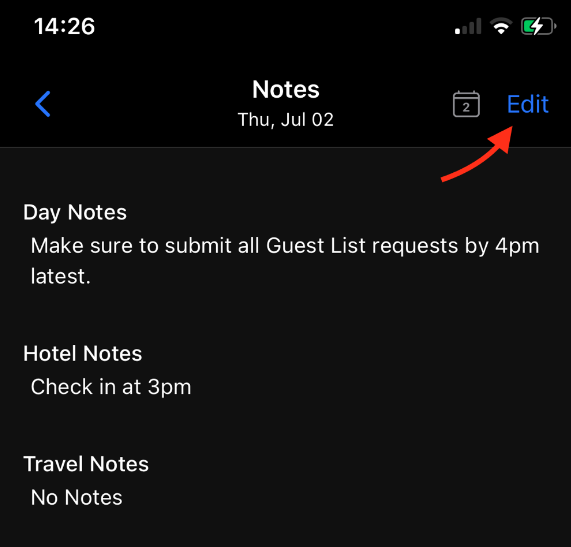
The next window you see is where you can view all Day, Hotel, and Travel Notes. To make an adjustment to the Travel Notes tap on the Edit button in the top right corner of your screen, and type in the travel-related information
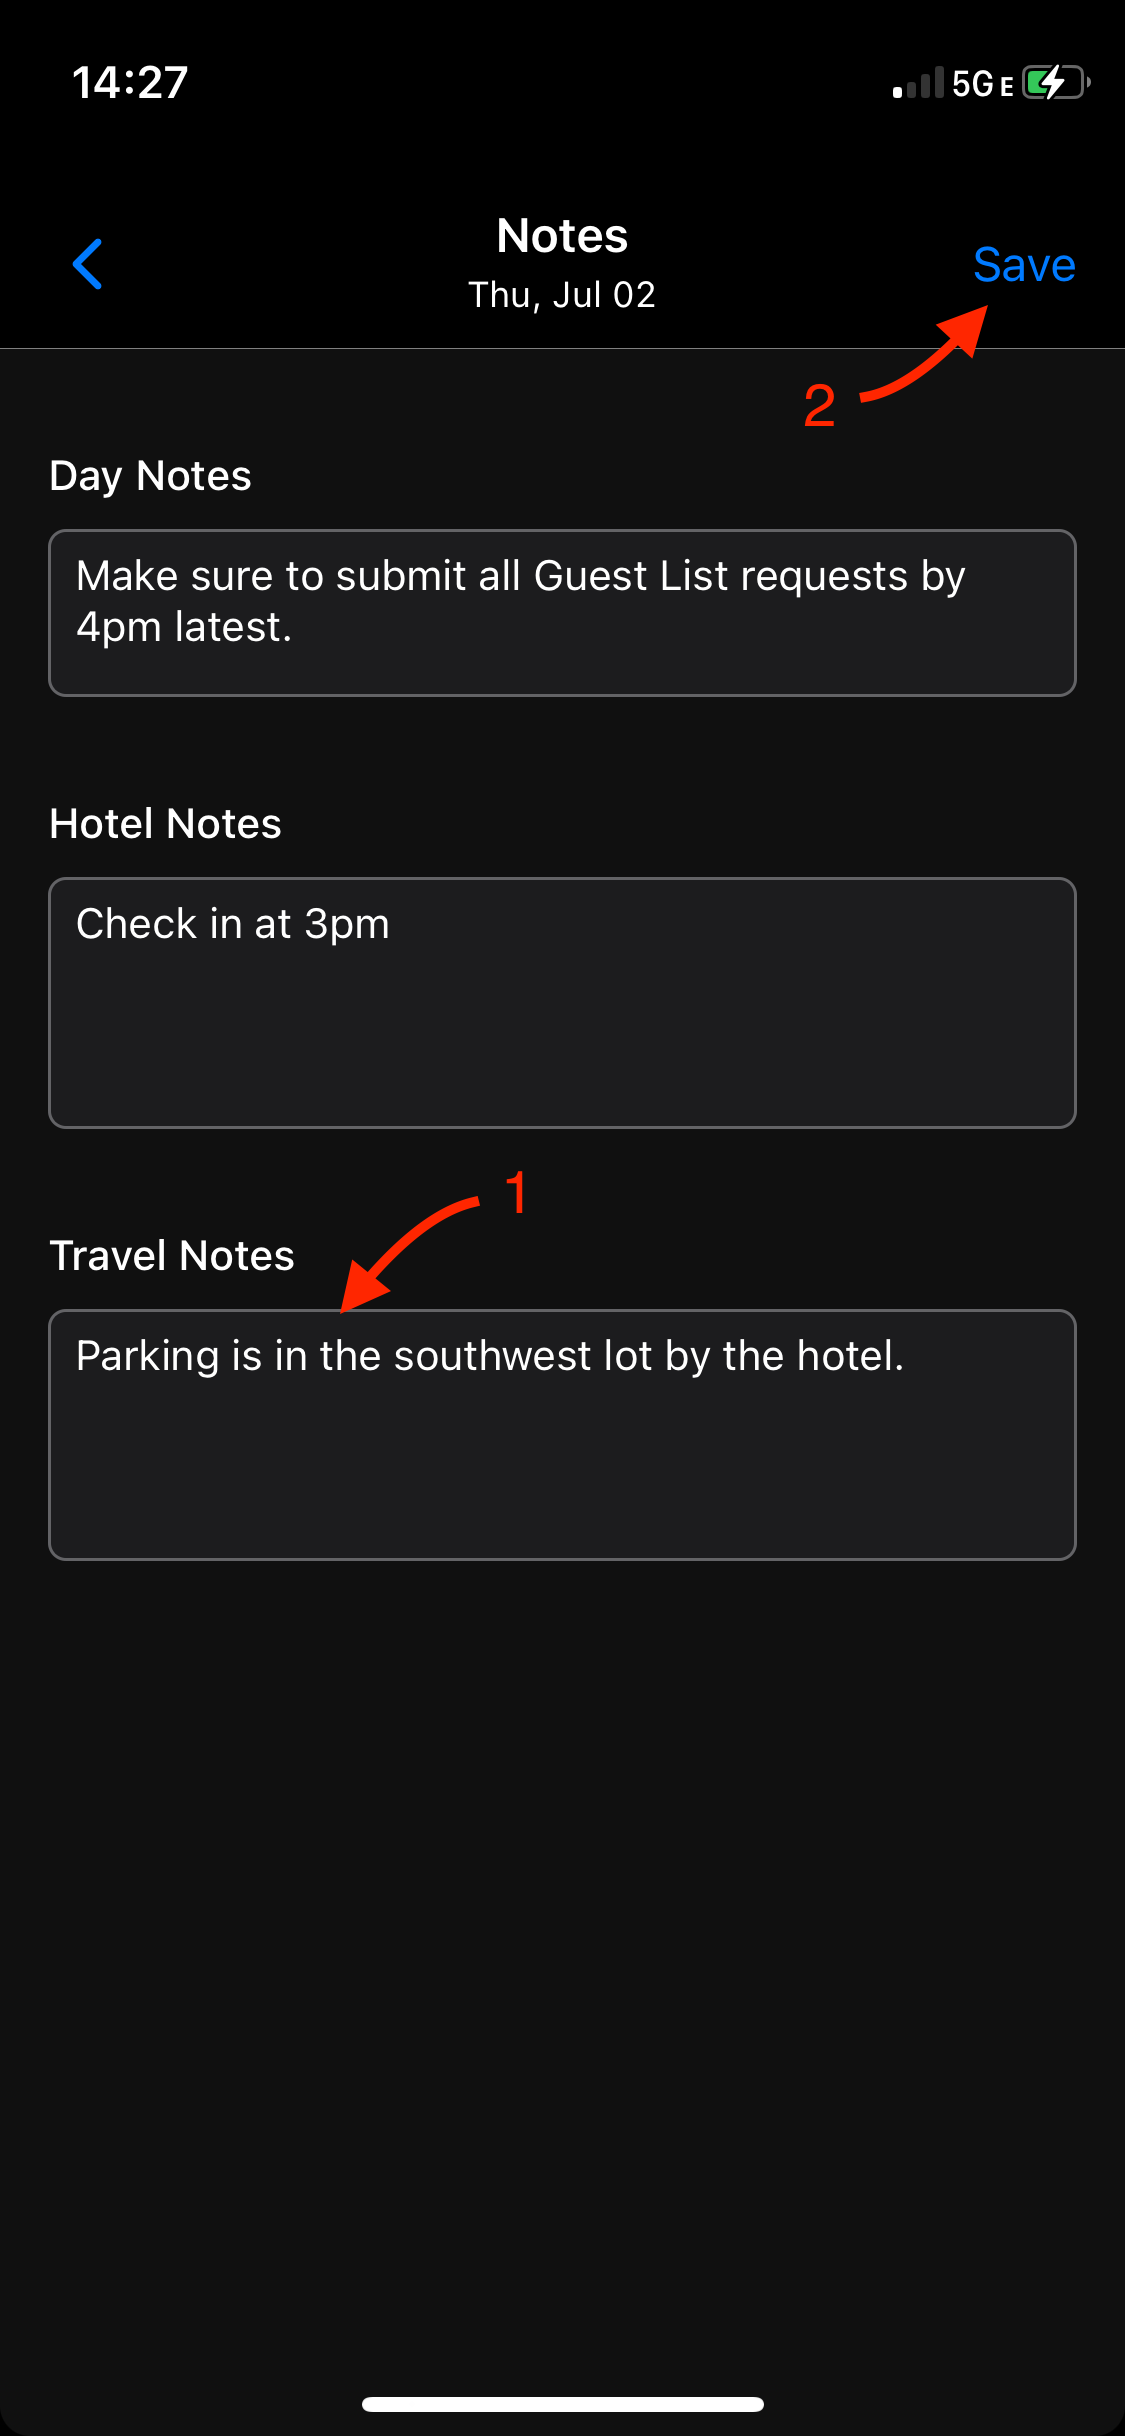
Press Save in the top right corner when finished.
Remove a Travel Item
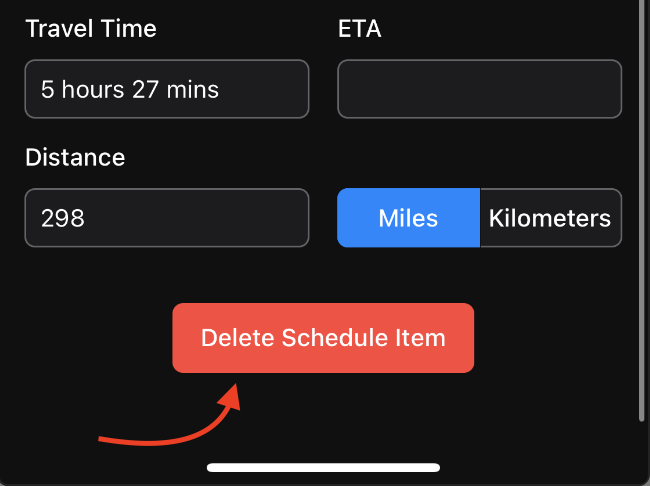
To delete a Travel Item, click on that item, select Edit in the top right corner, and then click Delete Travel Item in the bottom of the editing section:
Check out the video below for a real-time guidance on this article:
If you have any questions after following these instructions, please click here to open a Support Request or call +1-773-862-4246 to speak with a member of our Support Team between the hours of 10:00 am - 6:00 pm US Central Time (CT), Monday through Friday.