
By default, all Tours are visible to any User with access to the Organization. You can apply Visibility to Tours to allow only certain Users to access the record. Note: Users with Administrator, Accounting, or Manager Organization Permissions will be able to view all Tours, regardless of Visibility settings.
This article covers:
How to Navigate to Tour Settings
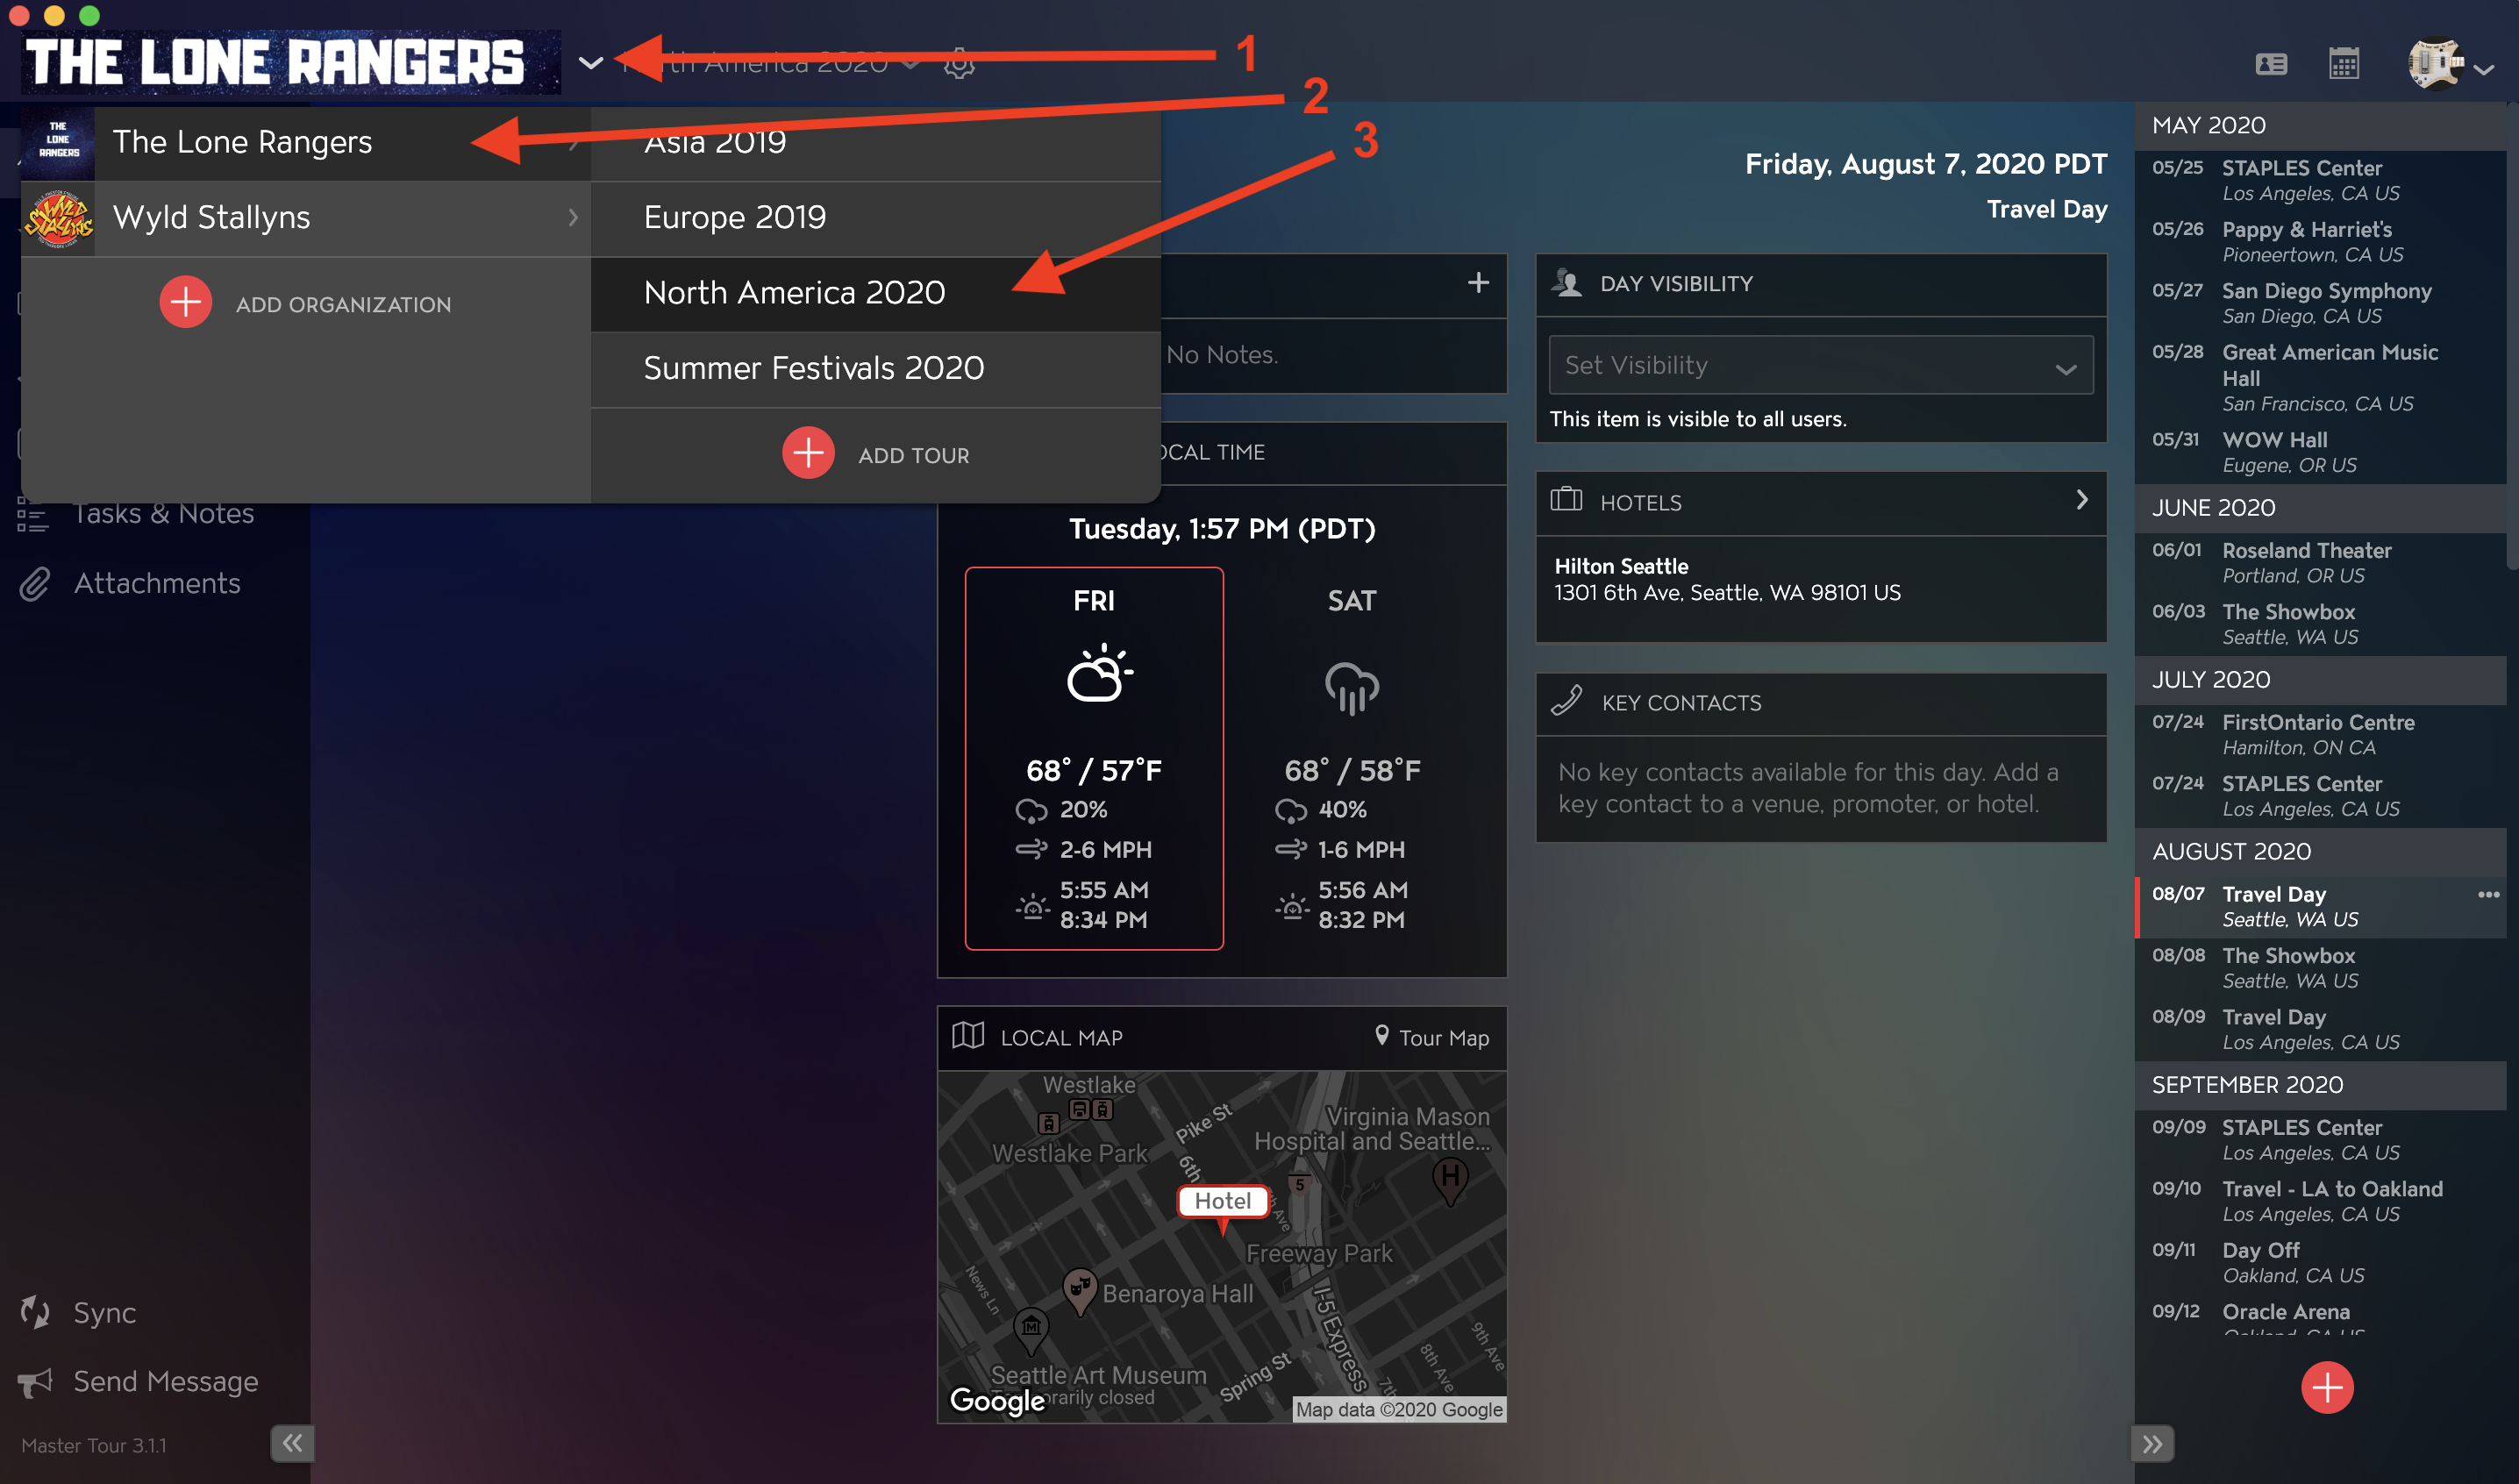
Within Master Tour, select the Tour that you would like to apply Visibility to.
- Click on the Organization Selector dropdown menu.
- Select an Organization.
- Select a Tour from the Tour Selector dropdown menu.
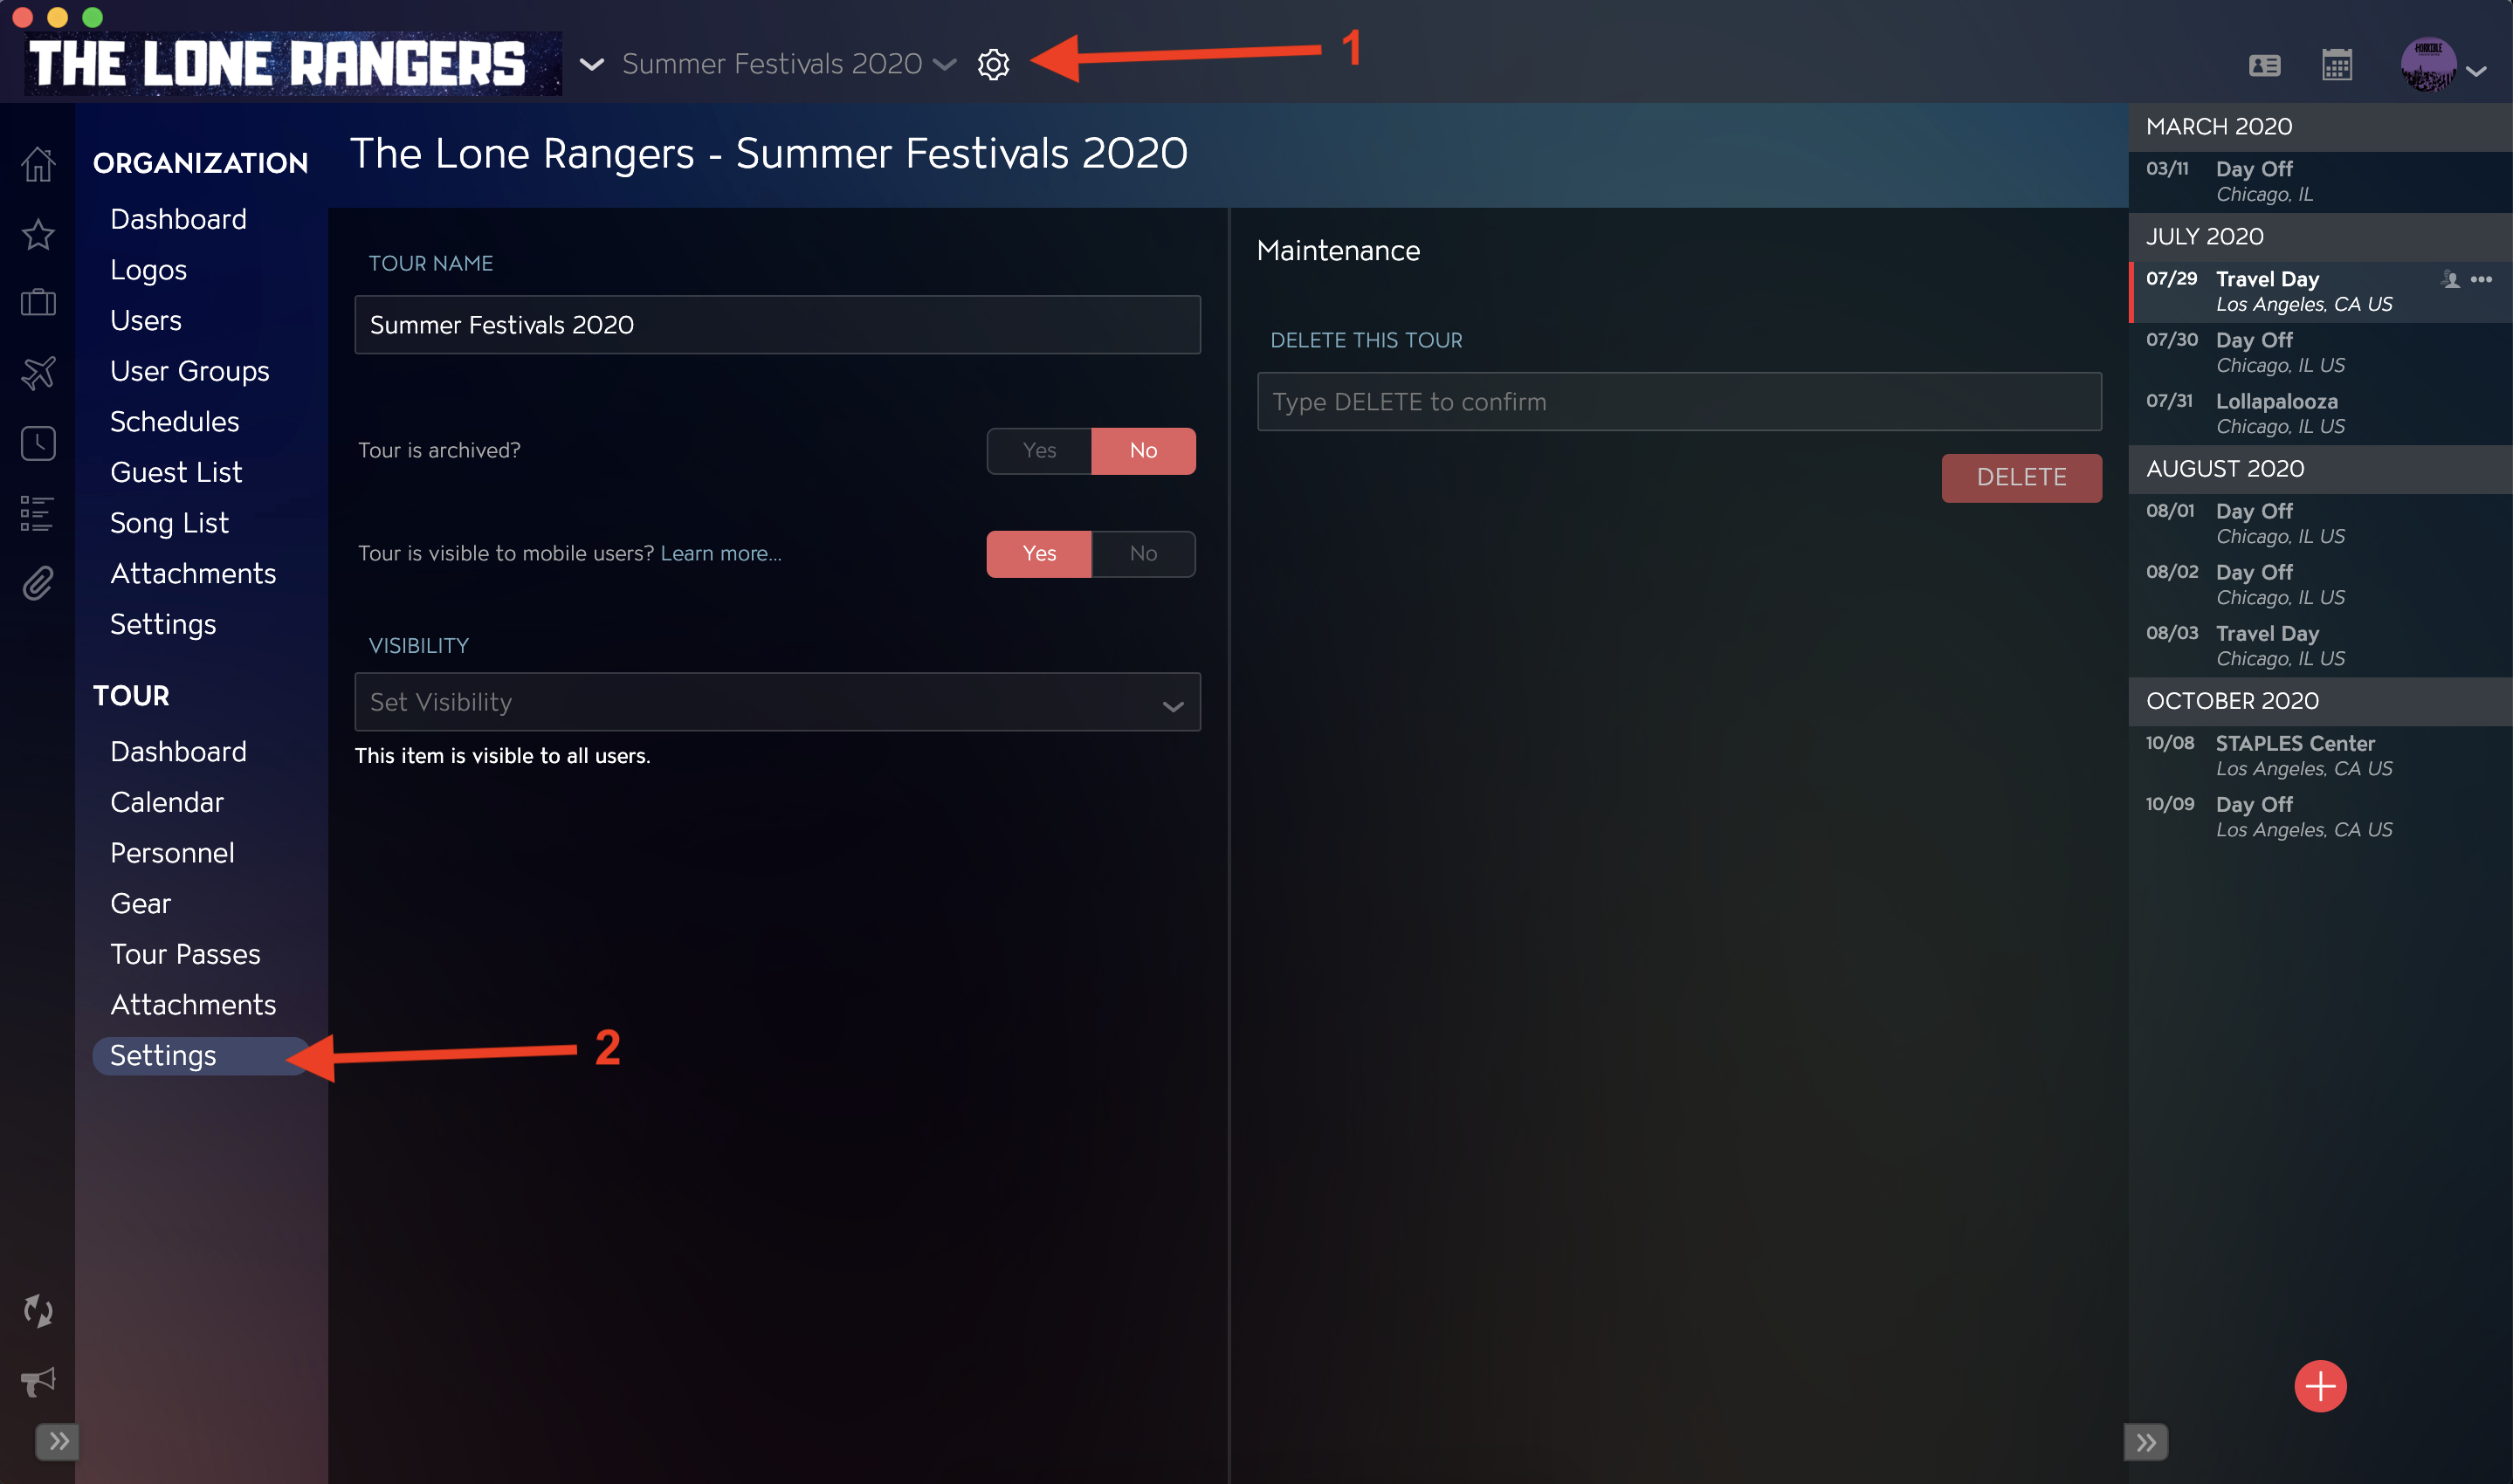
- Click on the Gear icon to the right of your Tour Name at the top of the application.
- Click into the Settings section within the Tour Section in the left menu.
How to Set Visibility for a Tour
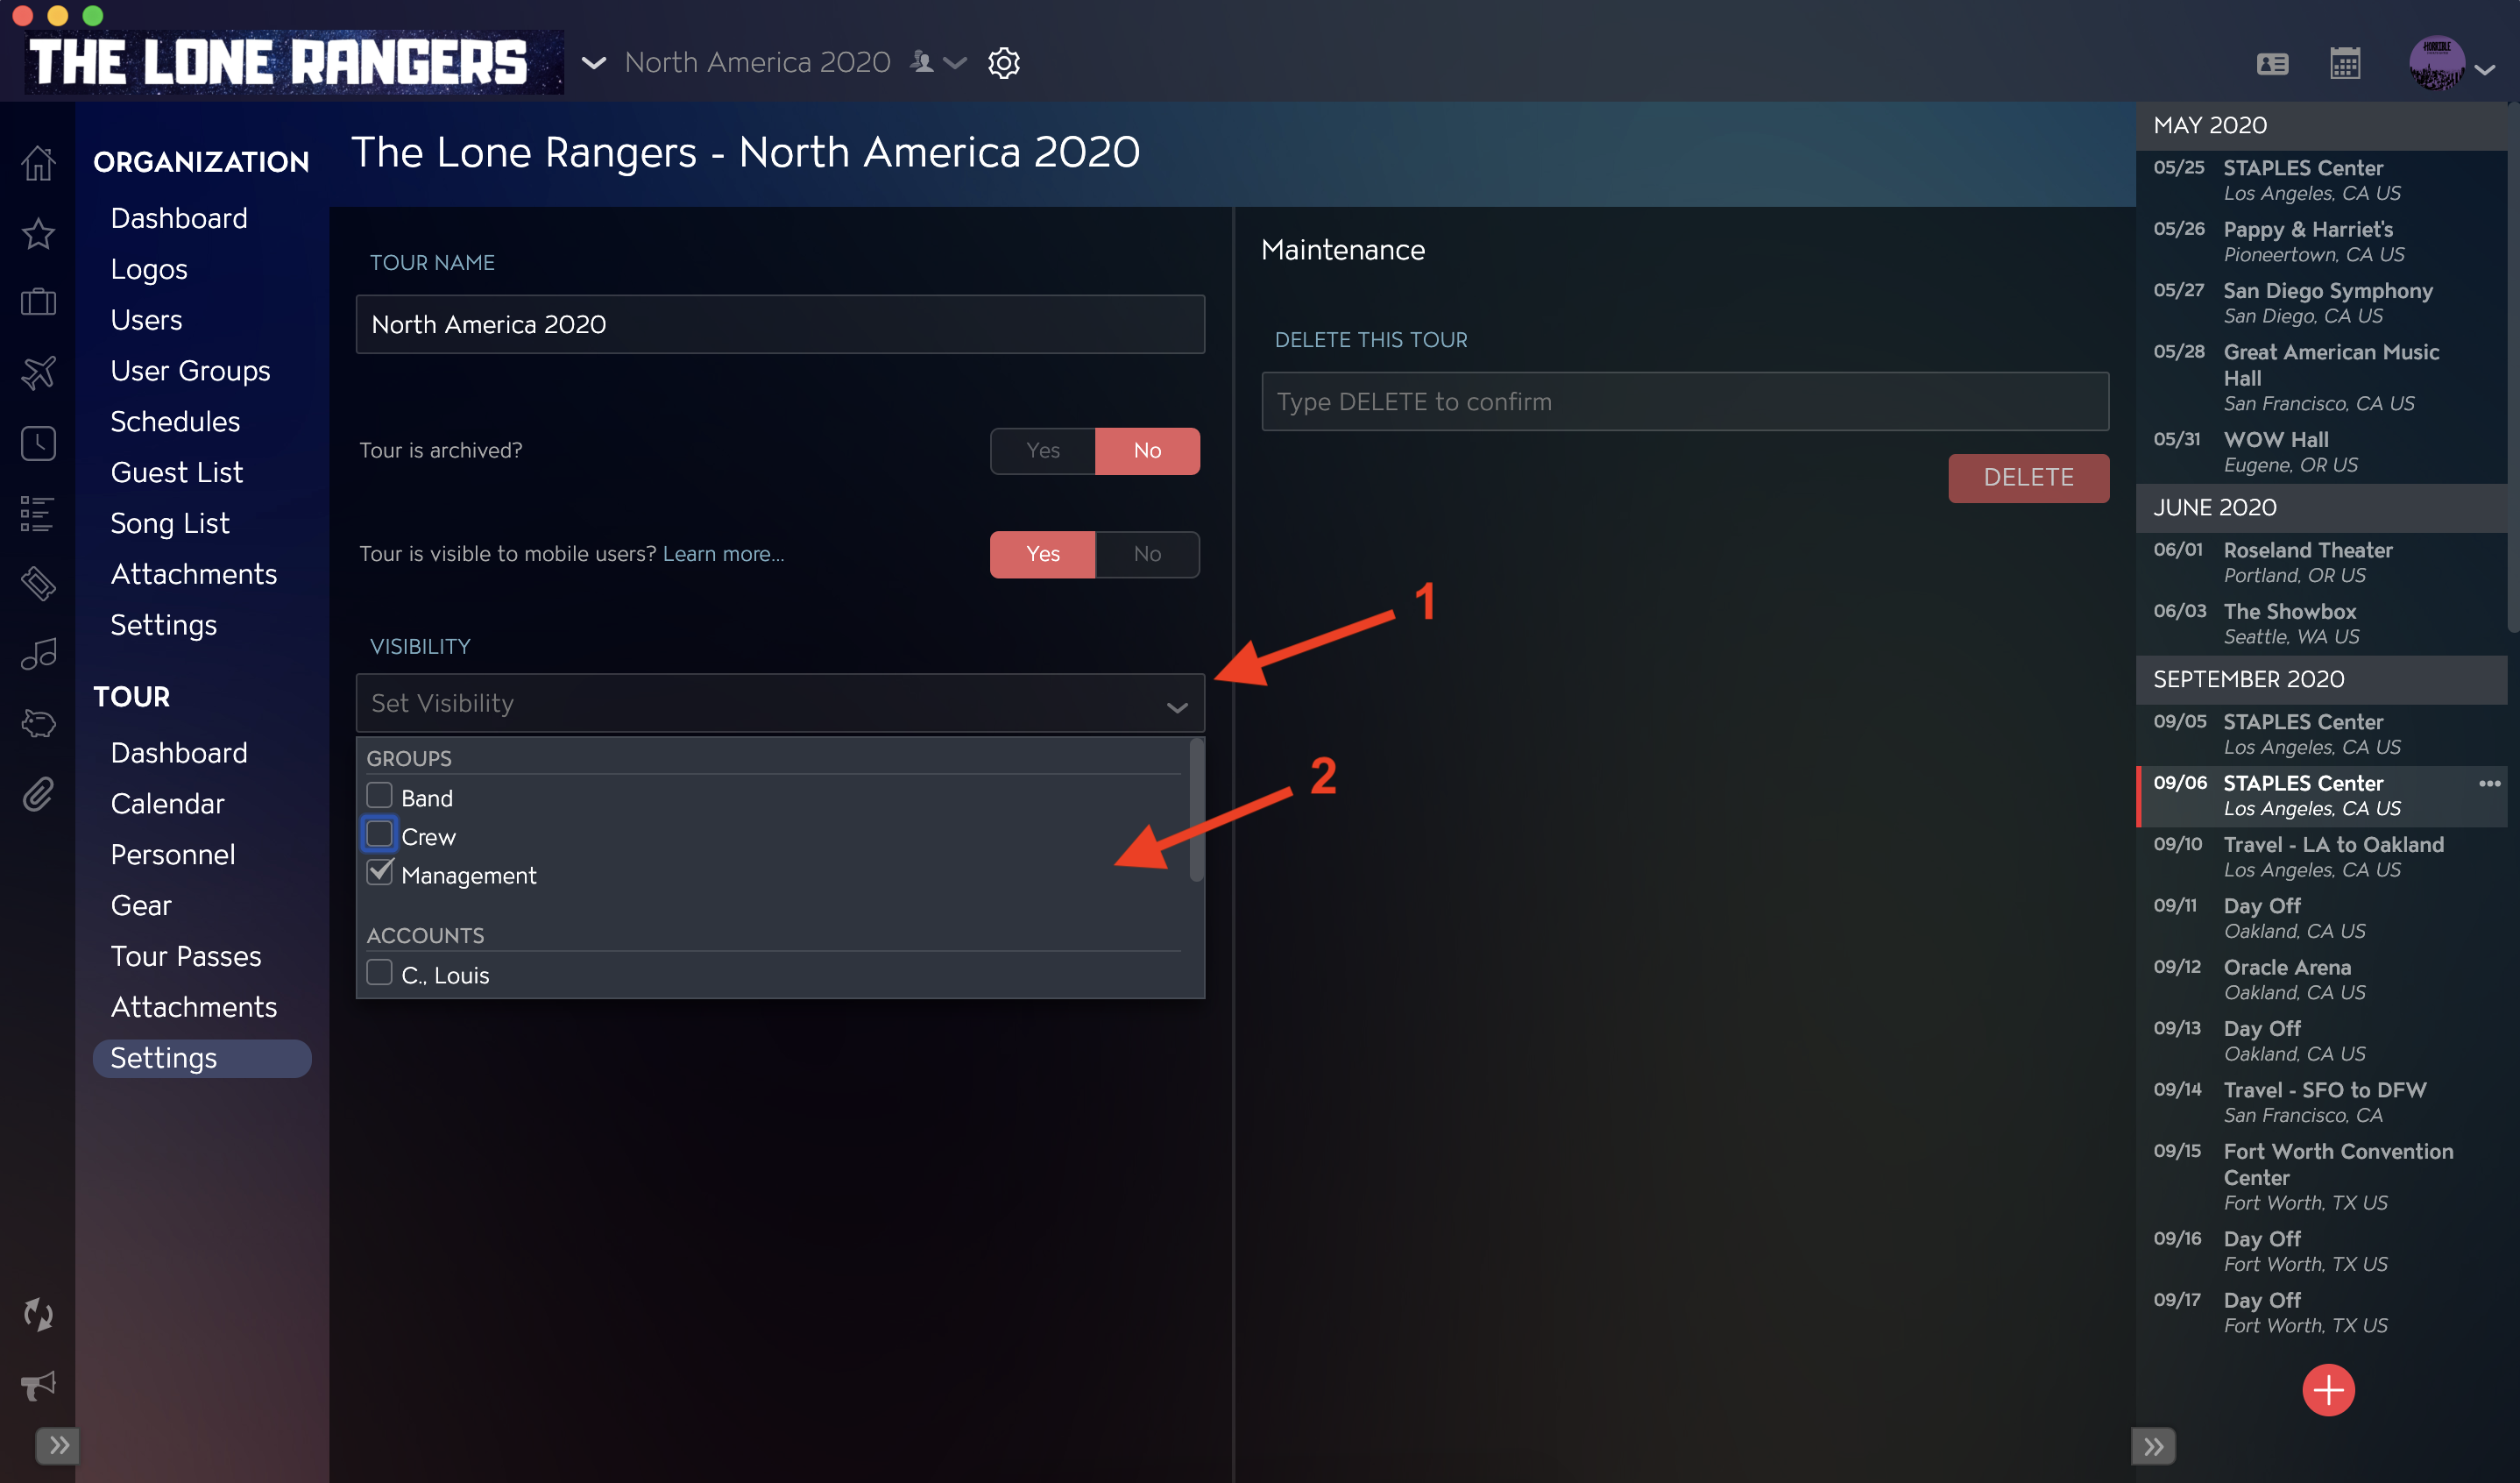
- Click on the Visibility dropdown menu in the left column.
- Select any Groups or Accounts that you would like to share the Tour with from the dropdown.
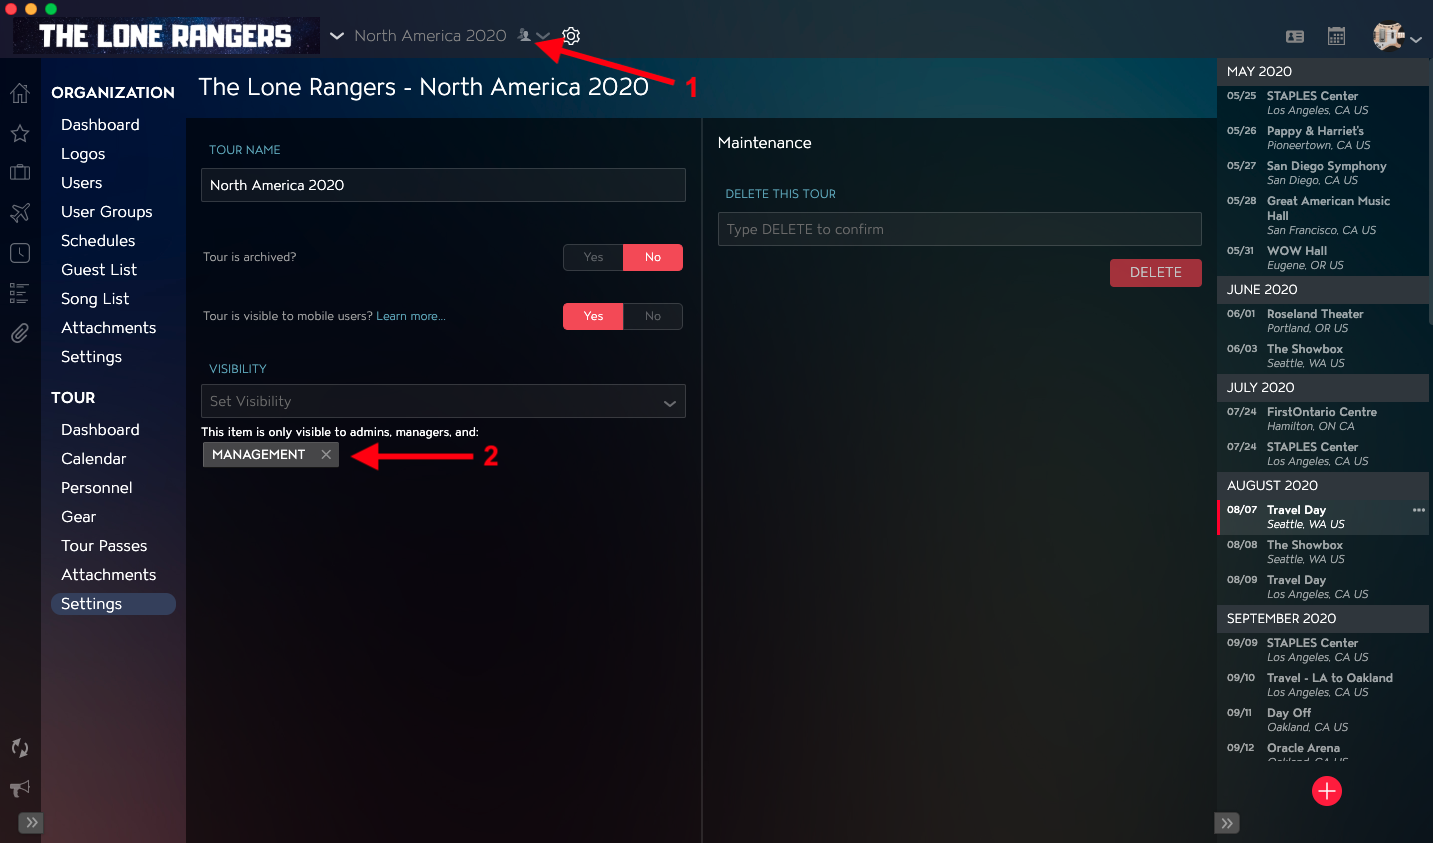
Once Visibility has been applied, you will see:
- The Visibility Icon to the right of the Tour Name at the top of the application.
- Groups and Users have access to view the Tour below the Visibility field.
If you have any questions after following these instructions, please click here to open a Support Request or call +1-773-862-4246 to speak with a member of our Support Team between the hours of 10:00 am - 6:00 pm US Central Time (CT), Monday through Friday.